(Enlarge)
|
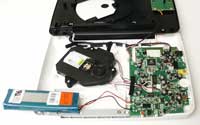
- Open the portable dvd player (screws on the bottom as well as three in the DVD bay area).
- The yoku battery is attached to the bottom casing with an adhesive tape so it will take a bit of time and care to pull it away.
- Once the battery is free, remove the double-sided adhesive tape.
|
(Enlarge)
|
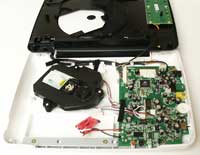
- Clip the cable connected to the yoku battery. Leave enough cable attached to the battery so that the insulation at the end of the cables can be removed and butt connectors attached.
- Clip the female end of the DC Fan Wire Extension so that approximately 2 - 3 inches remain. Strip the insulation off of each of the three cable leads.
- Drill a small hole into the bottom casing of the dvd player. Feed the three wires from the female end of the DC Fan Wire Exension through the hole, from the bottom up (you want the female head to be outside of the bottom casing.
- Connect each lead to a butt connector. Then strip the three power wires coming from the IC board (which were connected to the internal battery). Attach the red to the red of the DC Fan Extension with butt connector, black to black and white to yellow.
|
(Enlarge)
|
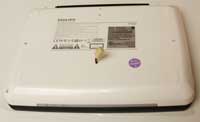
- Assemble the portable DVD player. When you flip it over you will see the female head of the DC Fan Extension exposed outside of the casing.
- Glue the female head to the case (make sure to place it properly so you can connect the male end to it).
|

(Enlarge)
|
- Connect (using butt connectors and stripping insulation off the ends of wire) the male end of the DC Fan Extension wire to the yoku battery.
- Be sure to connect red to red, black to black and yellow to white.
|
(Enlarge)
|
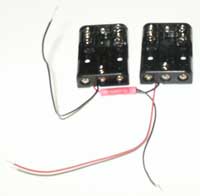
- Pair up the AAA battery holders.
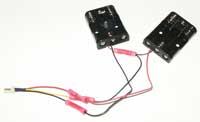
- Using a butt connector, connect the negative (black) wire of one to the positive (red) wire of the other with a separate length of wire also connected. Do this for each set of two.
|
(Enlarge)
|
- In this step I connected the male end of the second DC Fan Extension to one pair of battery holders (black to black, red to red, and the red/black to the yellow).
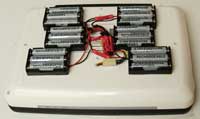
- UPDATE: After a trial run found out that one pair of battery holders (6 AAA batteries) only provides 35 minutes of DVD run-time. Therefore, to provide greater run-time, the black wire of each set (a set contains two battery holders) are connected together by a butt connector. Likewise the three red wires are connected together. The red/black connections (with the extra length of wire) are connected together. After that is all connected together attach the DC Fan Extension male wire together (black to black, red to red and the red/black pairs with extra wire are connected to yellow).
|
(Enlarge)
|
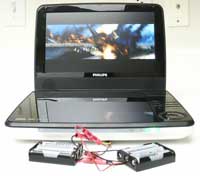
- Before gluing the battery holders to the bottom of the casing (if that is what you want to do), run a test to make sure all of the wiring connections are okay. If they are, the DVD player will play.
- UPDATE: In this trial run, initially only one set of battery holders were wired up. However, as can be seen, the wiring was okay and the dvd player operated.
|
(Enlarge)
|
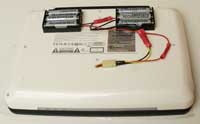
- Once you have a successful test, glue the battery holders to the bottom of the casing.
- UPDATE: In this trial run, initially only one set of battery holders were wired up.
|
(Enlarge)
|
- In this updated picture, all three sets of battery holders have been glued to the casing.
|


