|
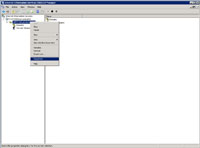
STEP 1
|
(Enlarge)
|
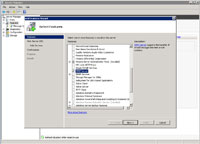
- Install the SMTP feature. Start by opening Server Manager and clicking on "Add Features".
|
|
STEP 2
|
(Enlarge)
|
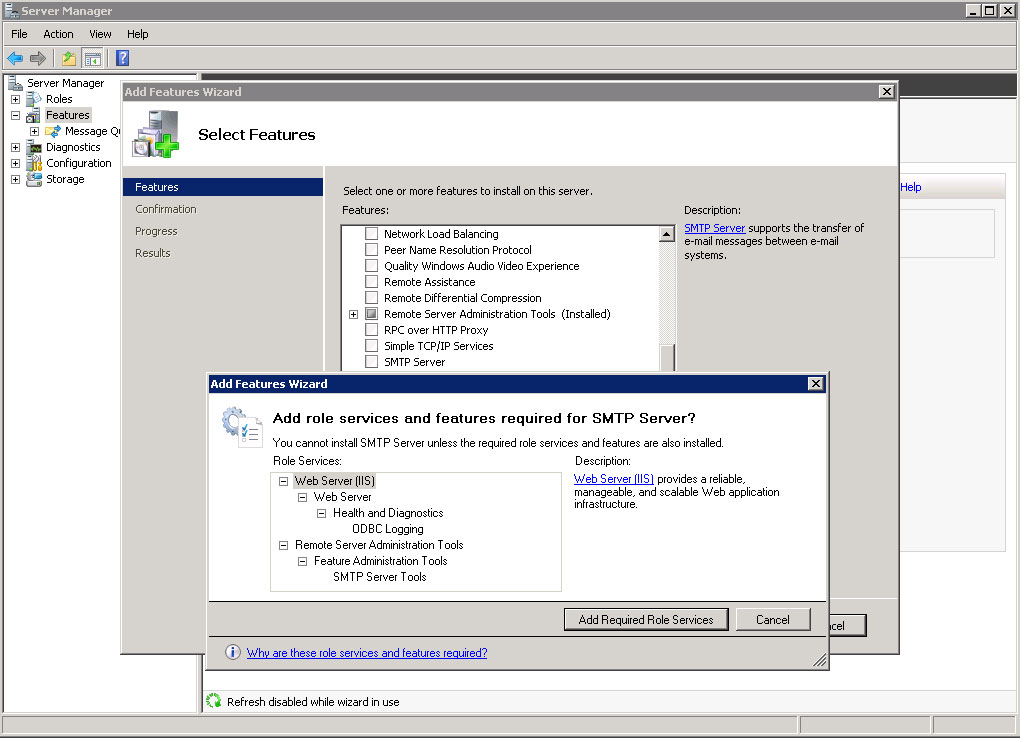
- Select SMTP Server and click the button "Add Required Role Services".
|
|
STEP 3
|
(Enlarge)
|
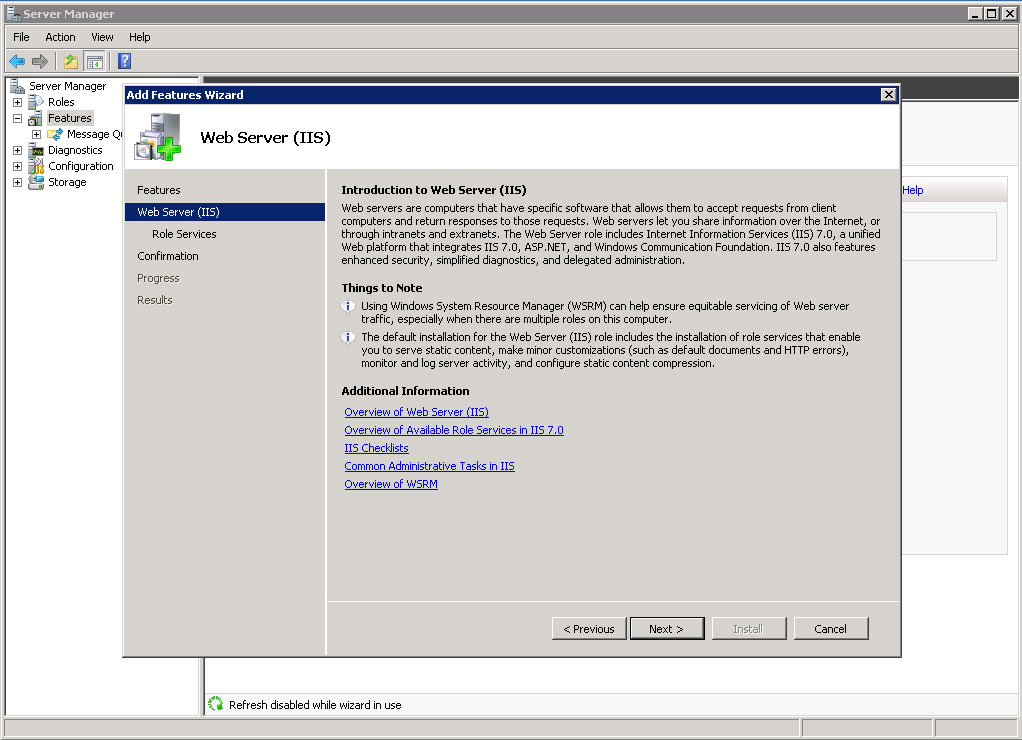
- Now that "SMTP Server" is checked, click the button "Next >".
|
|
STEP 4
|
(Enlarge)
|
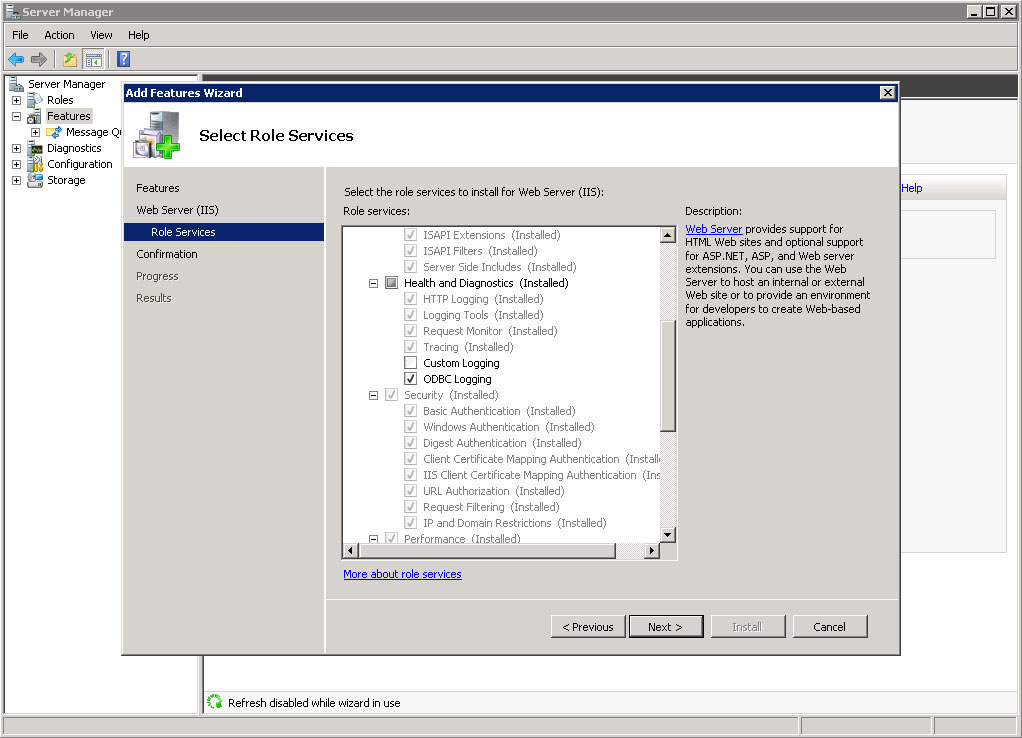
- Click "Next >" again to continue with the new feature installation.
|
|
STEP 5
|
(Enlarge)
|
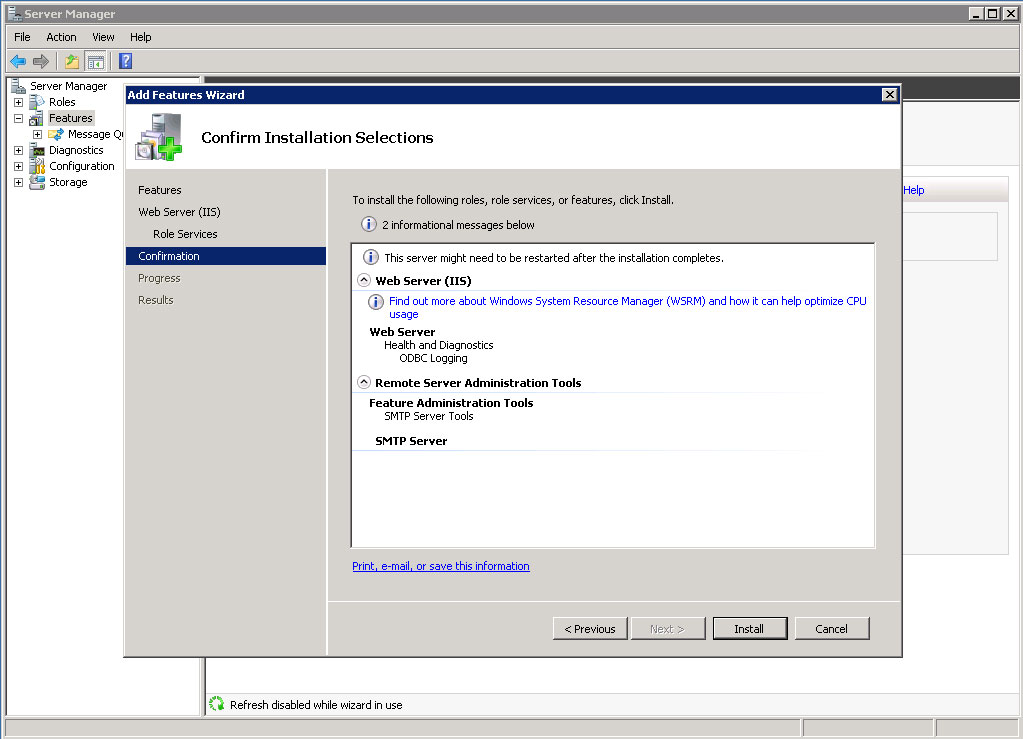
- "ODBC Logging" will be checked by default. Click the button "Next >".
|
|
STEP 6
|
(Enlarge)
|
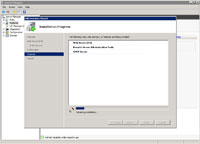
- Confirm the new features installation by clicking on the button "Install".
|
|
STEP 7
|
(Enlarge)
|
- Now the installation takes place.
|
|
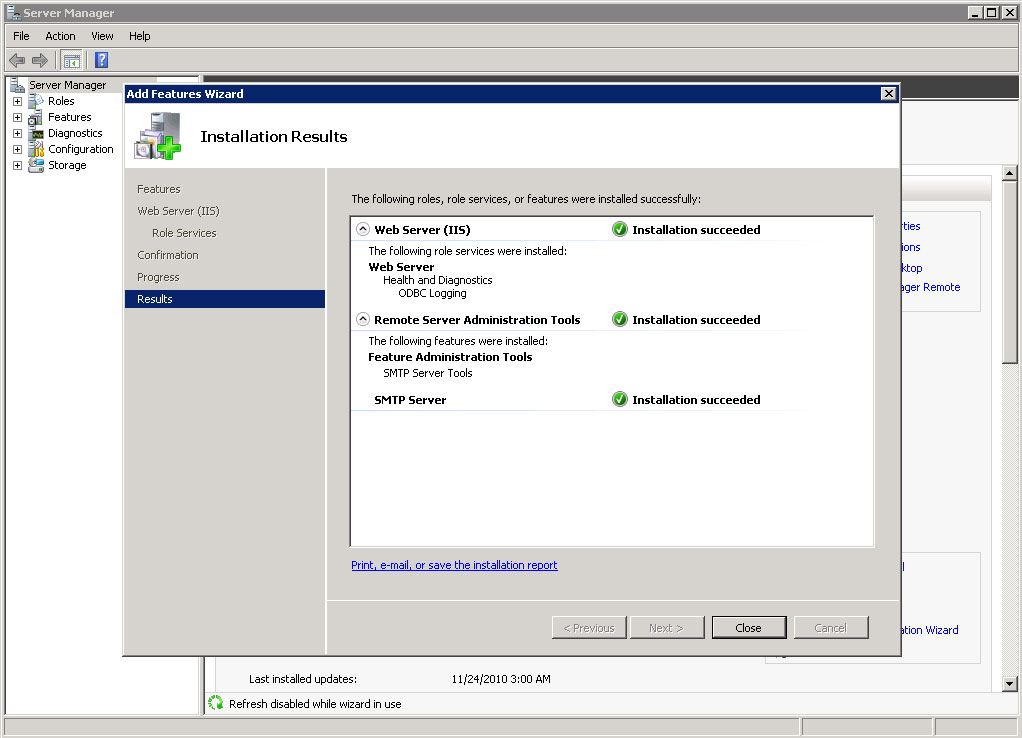
STEP 8
|
(Enlarge)
|
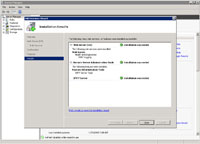
- When the installation succeeds you will see this result.
|
|
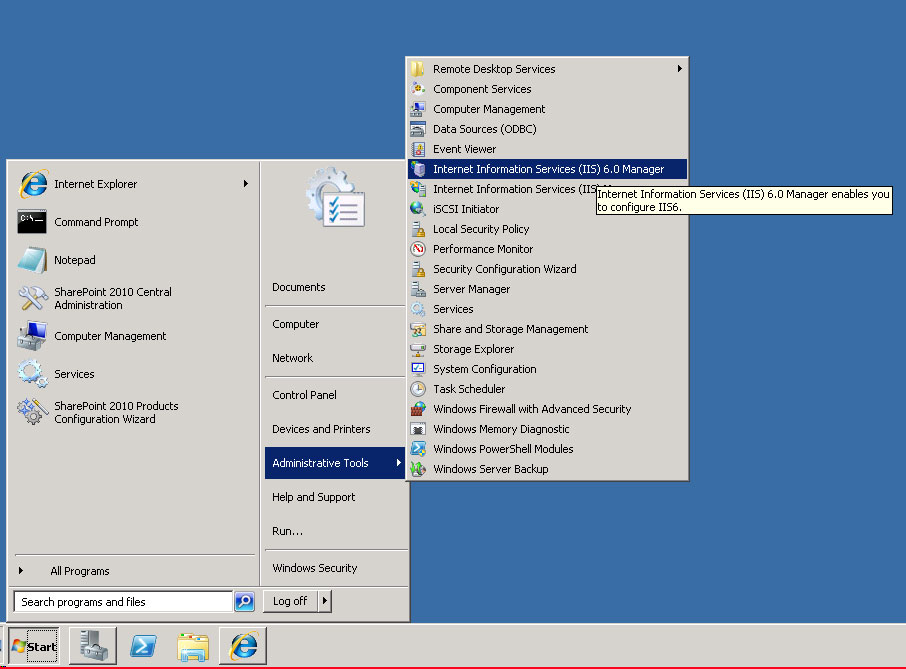
STEP 9
|
(Enlarge)
|
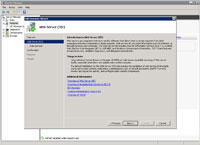
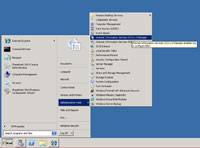
- Now the SMTP server needs to be configured. This is accomplished by going to "Internet Information Services (IIS) 6.0 Manager" from the Start menu.
|
|
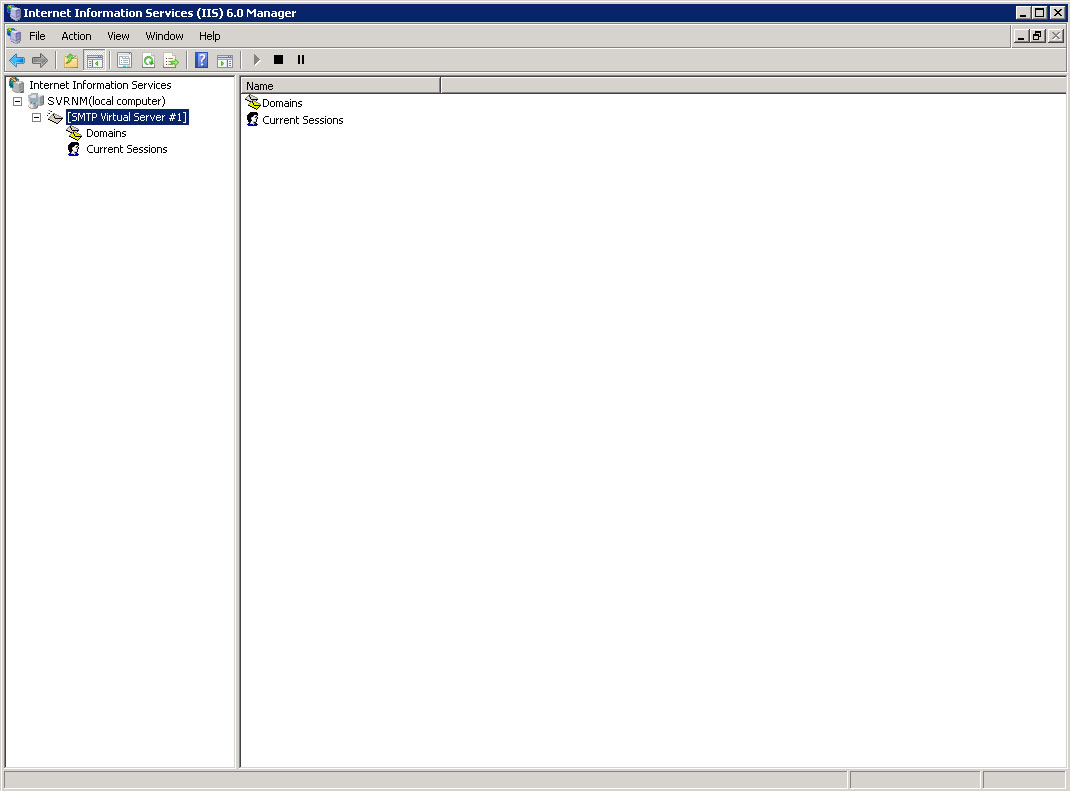
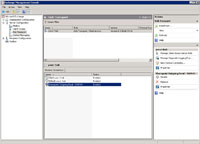
STEP 10
|
(Enlarge)
|
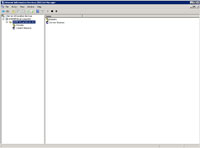
- Select "SMTP Virtual Server #1".
|
|
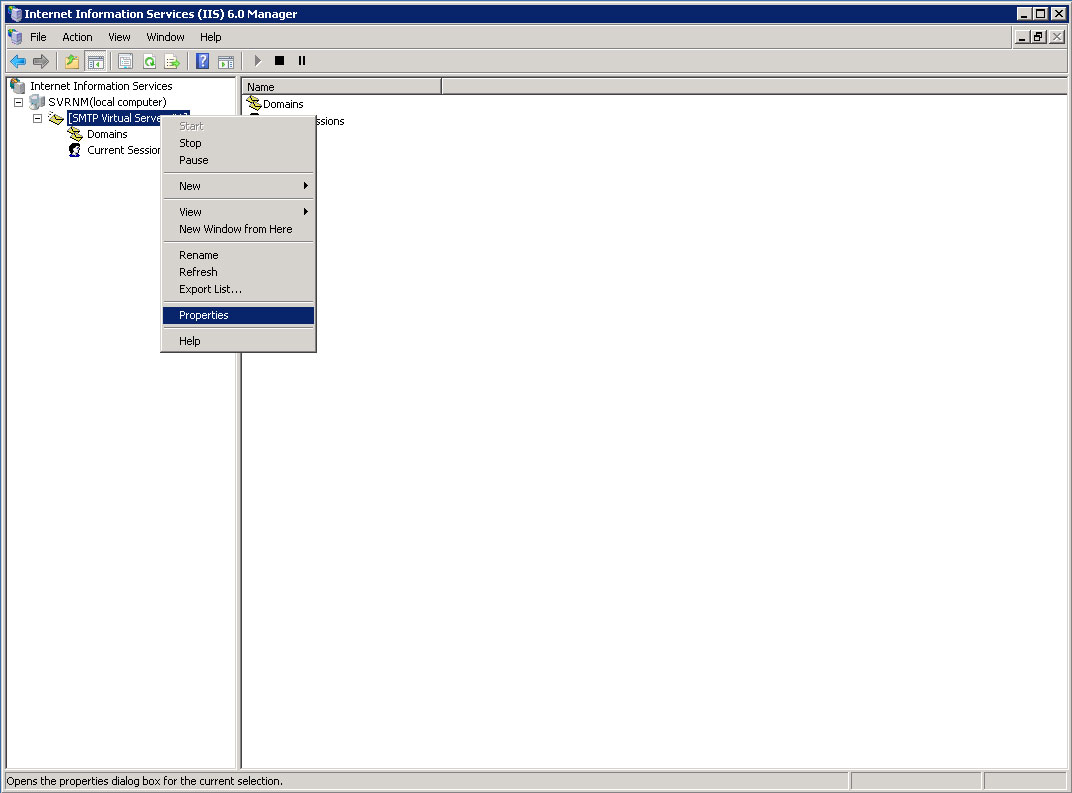
STEP 11
|
(Enlarge)
|
- Right click and select "Properties".
|
|
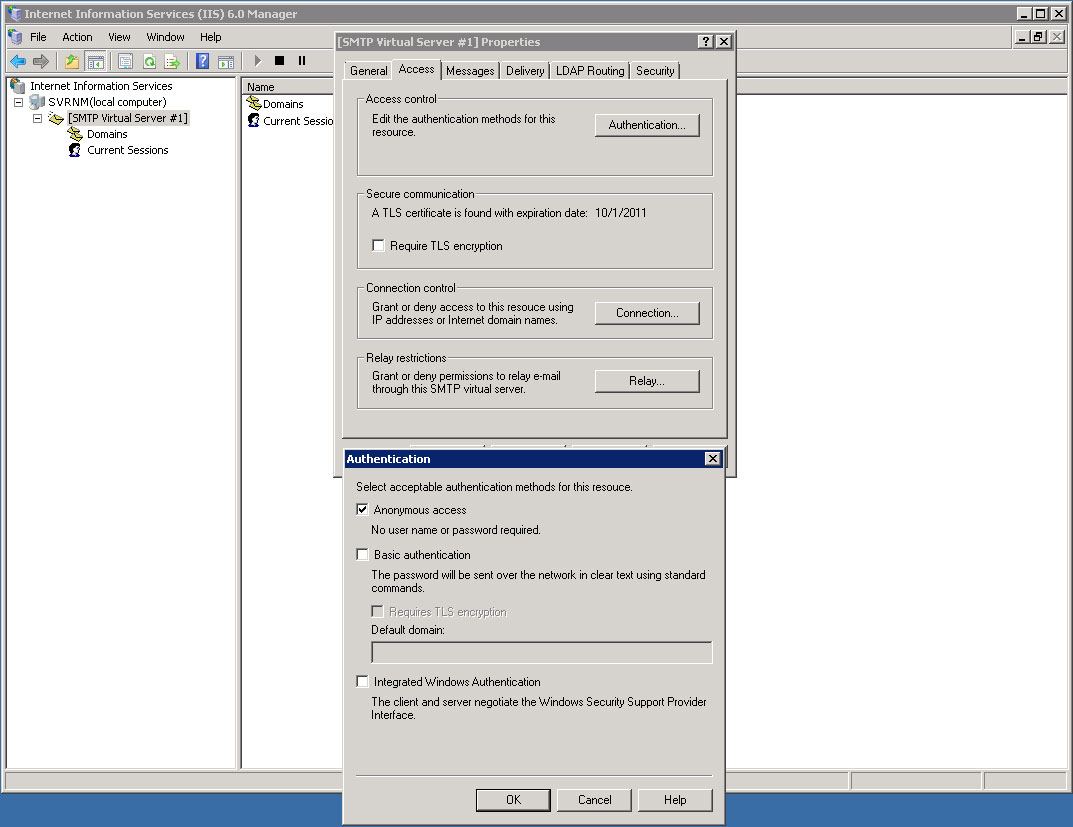
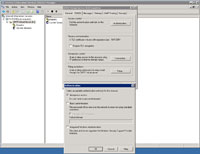
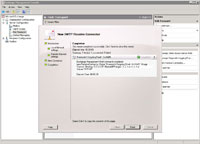
STEP 12
|
(Enlarge)
|
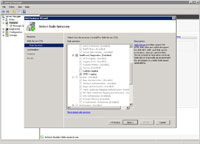
- After opening the "Access" tab click on the "Authentication..." button under the "Access control" section. Ensure "Anonymous access" is checked.
|
|
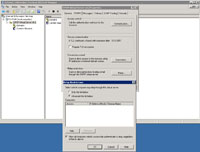
STEP 13
|
(Enlarge)
|
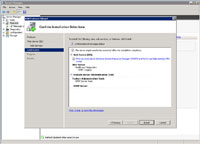
- Click on the "Relay..." button under the "Relay restrictions" section. Select "All except the list below" and check the checkbox unless you already have something different in place.
|
|
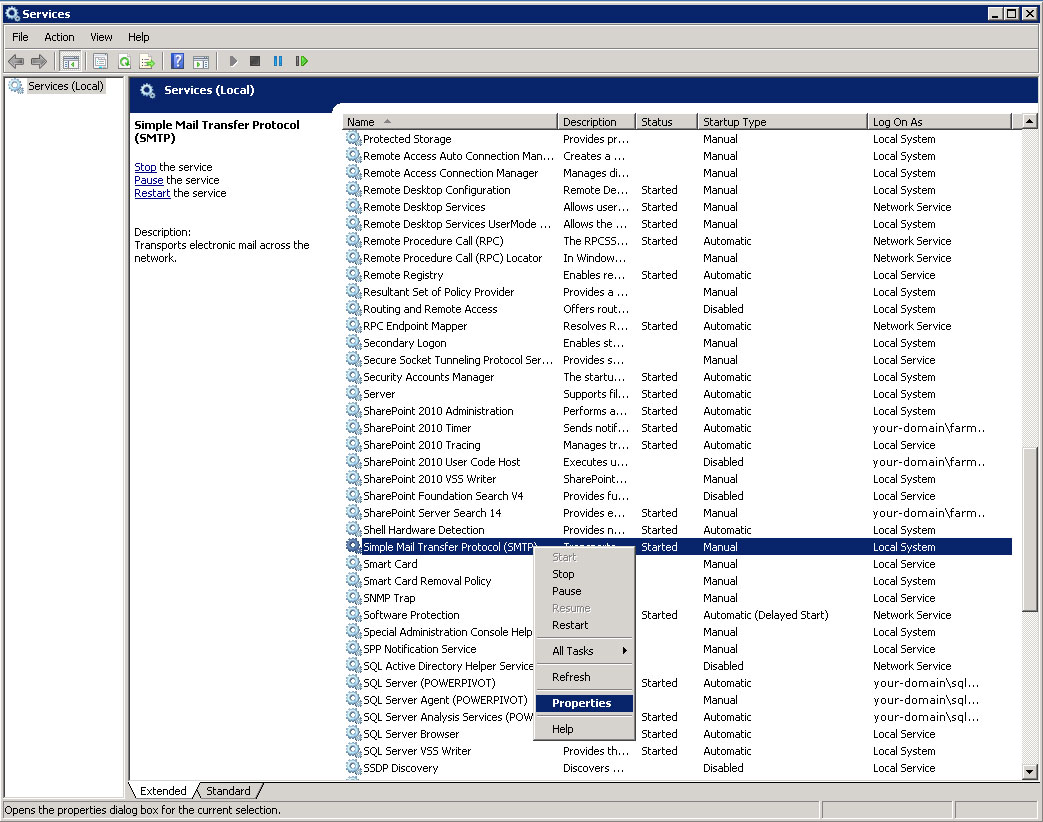
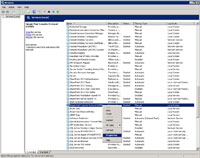
STEP 14
|
(Enlarge)
|
- Under Services, locate the "Simple Mail Transfer Protocol (SMTP)", right-click and select "Properties".
|
|
STEP 15
|
(Enlarge)
|
- Under the "General" tab, select Startup type as "Automatic".
- THIS IS THE LAST STEP FOR INSTALLING SMTP.
|
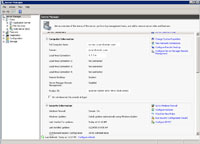
|
STEP 16
|
(Enlarge)
|
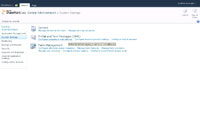
- Open Central Administration using the farm account. From System Settings click on "Configure outgoing e-mail settings".
|
|
STEP 17
|
(Enlarge)
|
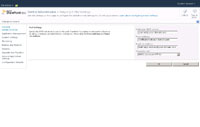
- Complete the Mail Settings section and click the "OK" button.
|
|
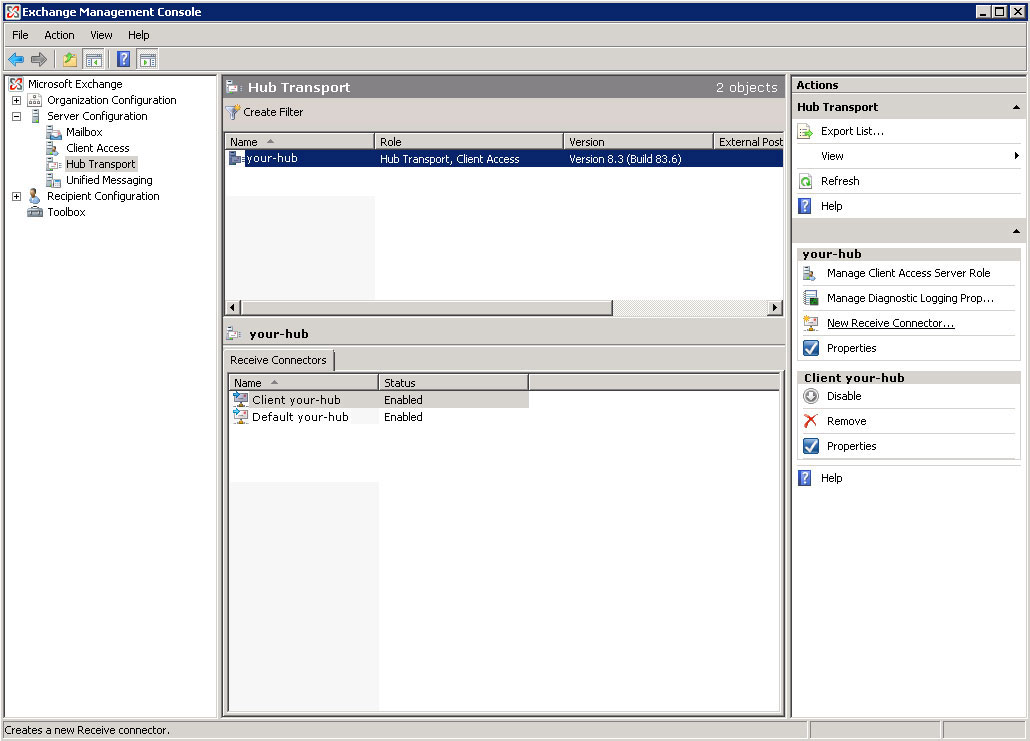
STEP 18
|
(Enlarge)
|
- Now open the Exchange Management Console on the server designated as the Hub Transport and click on "New Receive Connector".
|
|
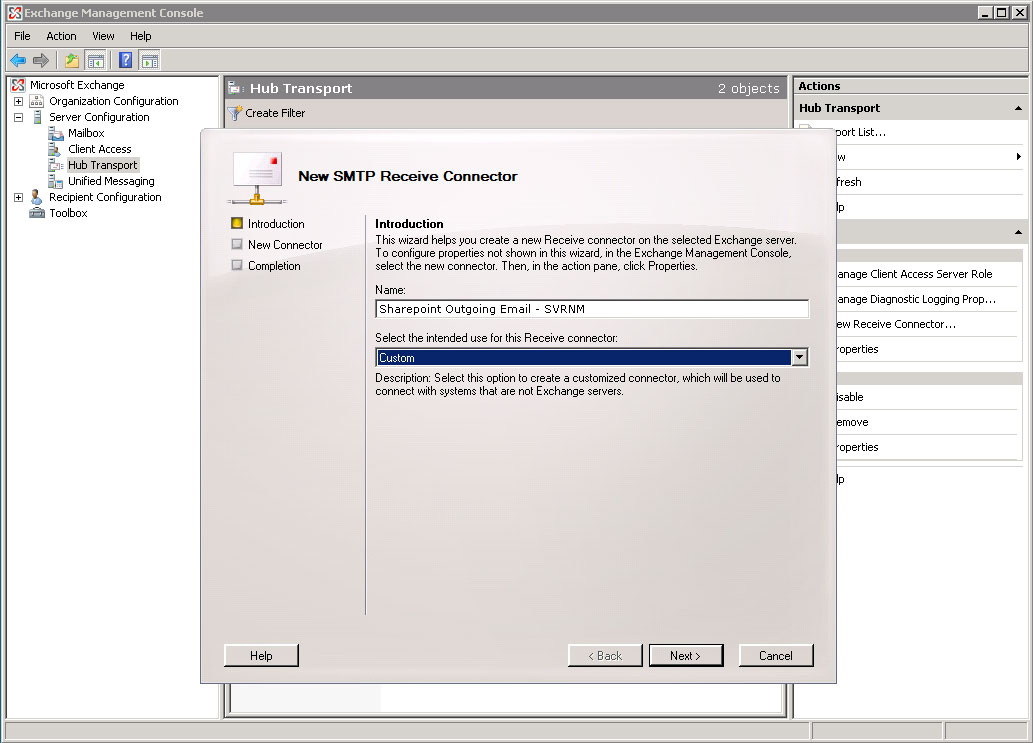
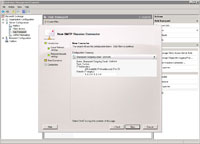
STEP 19
|

(Enlarge)
|
- Enter a descriptive name for the new SMTP Receive Connector; intended use as "Custom" and click on the button "Next >".
|
|
STEP 20
|
(Enlarge)
|
- Click on the "Edit..." button.
|
|
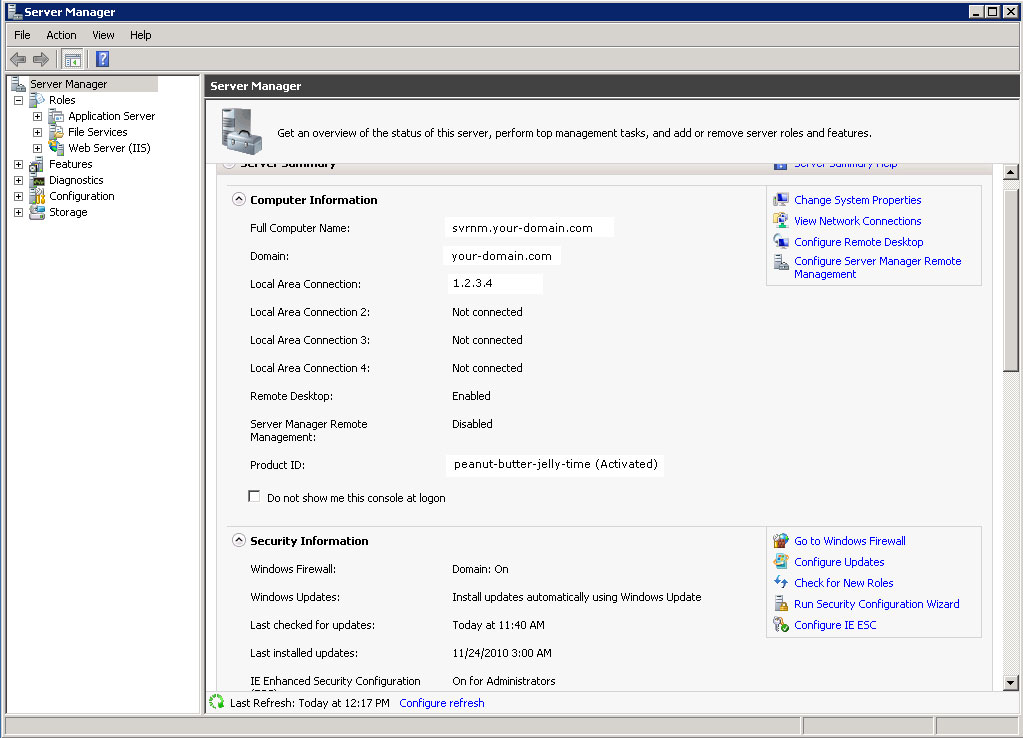
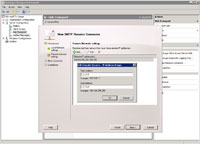
STEP 21
|
(Enlarge)
|
- If you don't know the IP address of the Sharepoint 2010 server where you've installed the SMTP Service, you may want to open Server Manager to get the IP address.
|
|
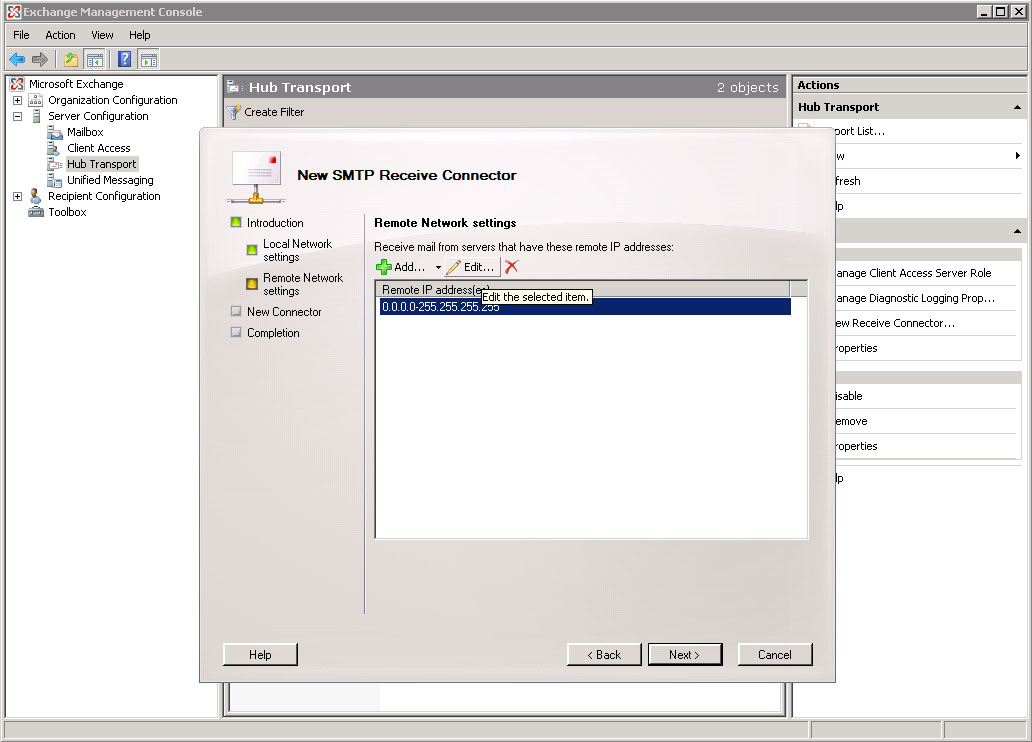
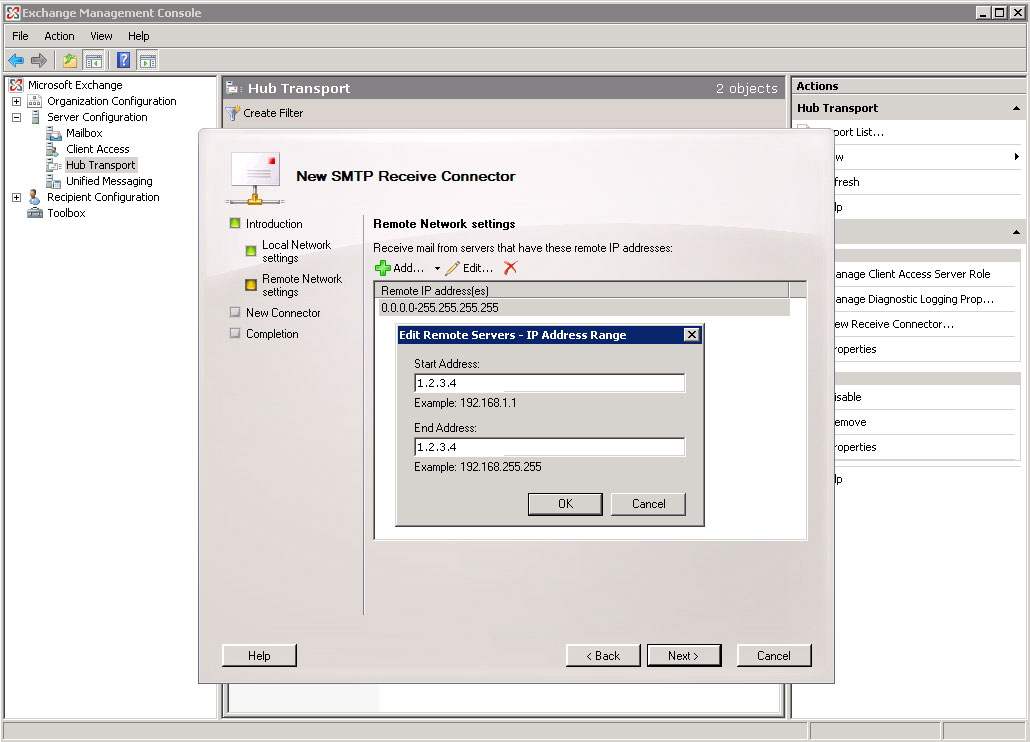
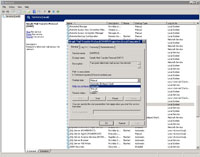
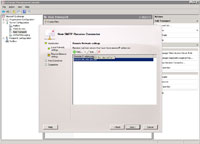
STEP 22
|
(Enlarge)
|
- Enter the IP address of the Sharepoint 2010 server under the "Edit Remote Servers" pane and click the "OK" button.
|
|
STEP 23
|
(Enlarge)
|
- Be sure to click the "New" button since you are just being presented a summary.
|
|
STEP 24
|
(Enlarge)
|
- After the connector has been created, click on the button "Finish".
|
|
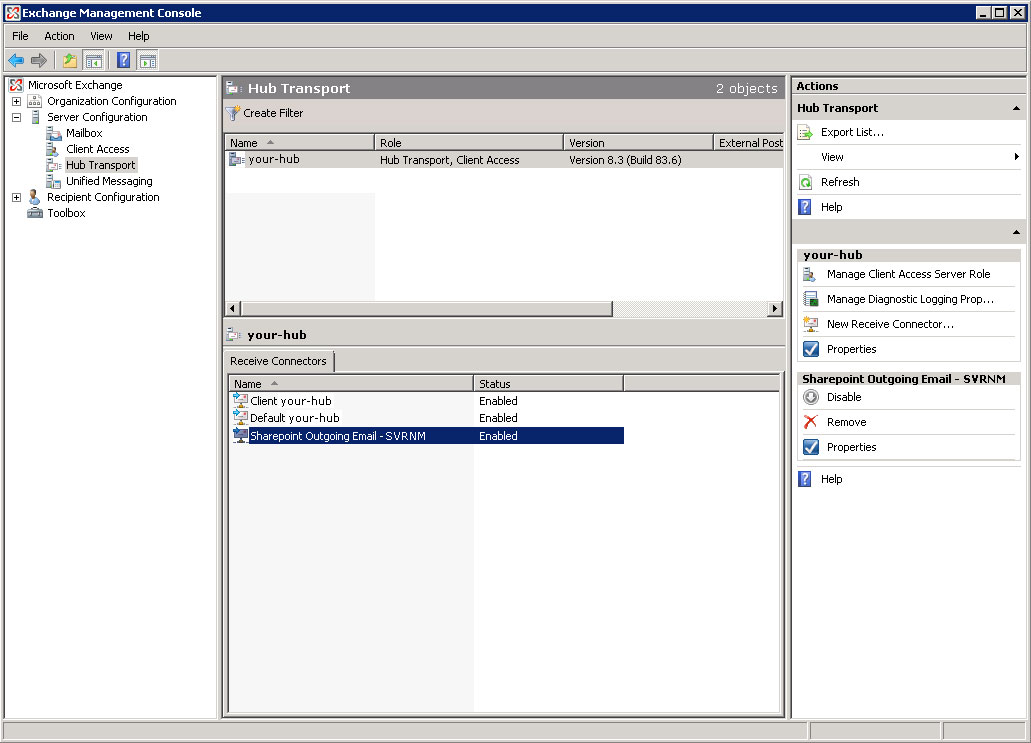
STEP 25
|
(Enlarge)
|
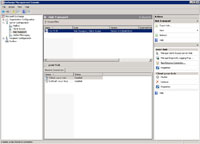
- Under Receive Connectors you should see the connector you just created. Select it and click "Properties" from the actions pane.
|
|
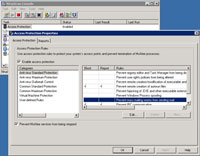
STEP 26
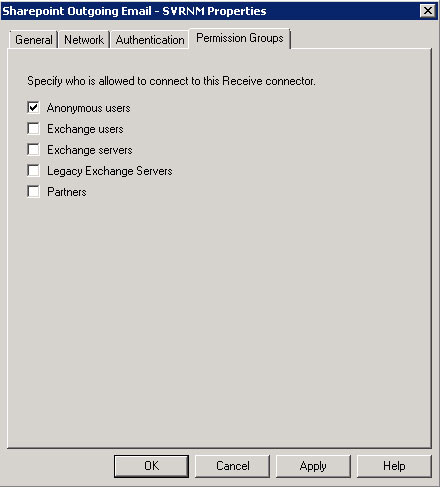
|

(Enlarge)
|
- Under the "Permission Groups" tab, ensure that "Anonymous users" is checked. You may also need to check "Exchange Servers".
- NOTE: If you are running Exchange 2007 and email is going to be sent off of your domain (that is, into the Internet somewhere) and you have no authetication mechanism in place then you will need to open the Exchange Shell (not Powershell) and enter the following:
Get-ReceiveConnector "ReceiveConnectorNameHere" | Add-ADPermission -User "NT AUTHORITY\ANONYMOUS LOGON" -ExtendedRights "ms-Exch-SMTP-Accept-Any-Recipient"
-
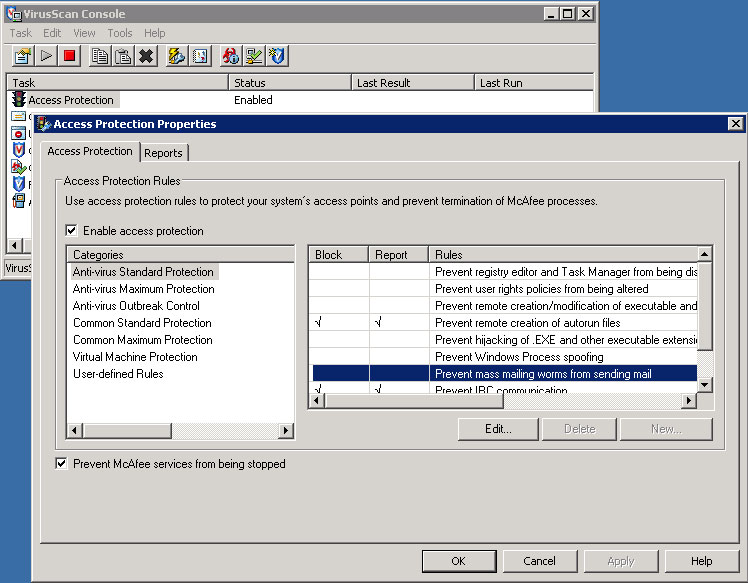
(Enlarge) |
If you have an application such as McAfee running on the Sharepoint 2010 server and you find that emails are still not being delivered anywhere, you may need to explore the application and uncheck "Block" and possibly "Report" for the section "Prevent mass emailing worms from sending email".
|
|
|
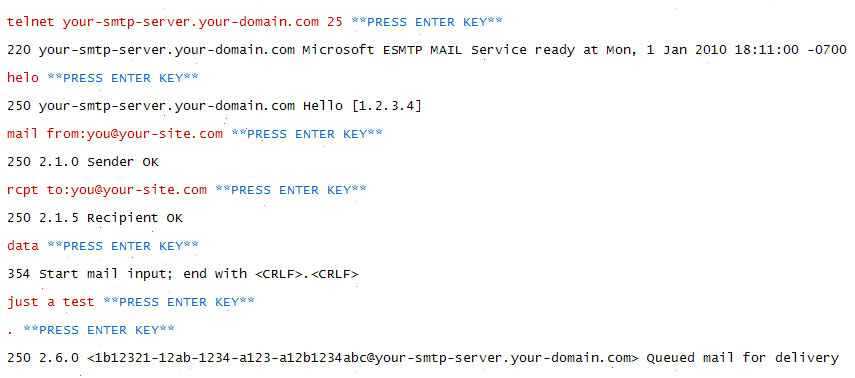
STEP 27
|
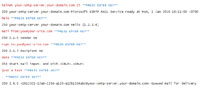
(Enlarge)
|
- Now go back to the Sharepoint 2010 server. Open the command-line so you can perform a simple email message send test. This test requires that telnet is installed on the server (which you can disable from Services later). As shown in the image, the red lines are commands that you enter while lines preceeded by numbers are responses from your SMTP server. After completing the steps you should receive a simple email message.
|
|
STEP 28
|
(Enlarge)
|
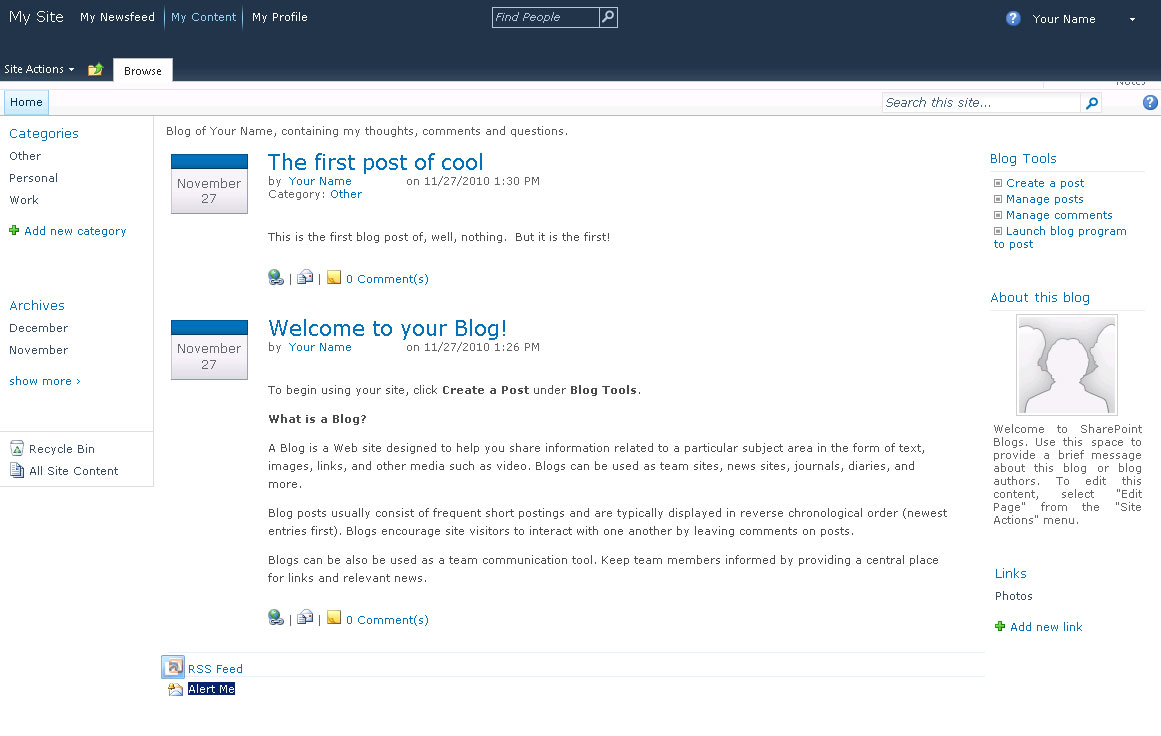
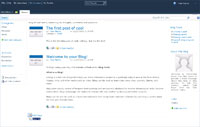
- To test the email notification capability in Sharepoint 2010 I chose to set up an alert on a personal "My Site". In this case, scroll to the bottom of the Blog page and click on "Alert Me".
|
|
STEP 29
|
(Enlarge)
|
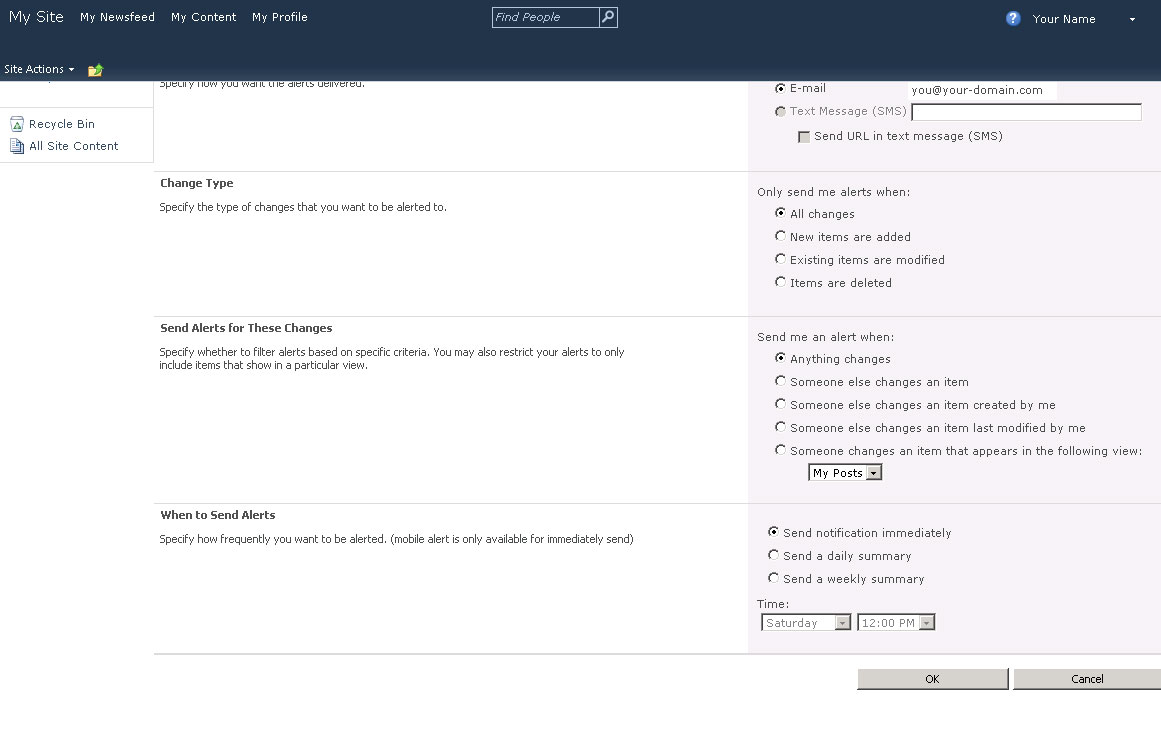
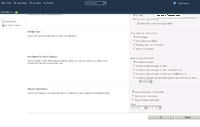
- Be sure to enter an email address you know is valid, select all changes for anything and send the notification immediately. After completing this step you should receive an email message.
|
|
STEP 30
|
(Enlarge)
|
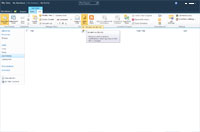
- For the Personal My Site blog to send out email alerts when someone submits to a blog post requires that you set up an email alert elsewhere; which is kind of confusing given that if you had chosen to get email alerts when anything changes (from the "Alert Me" blog page link you setup) you would assume that means when someone adds a comment to the personal blog as well. That's actually NOT the case. Instead you need to click on "Comments" under the "Lists" header on the left side of the page from the main blog page. Then click on the "Alert Me" icon and then "Set alert on this list".
|
|
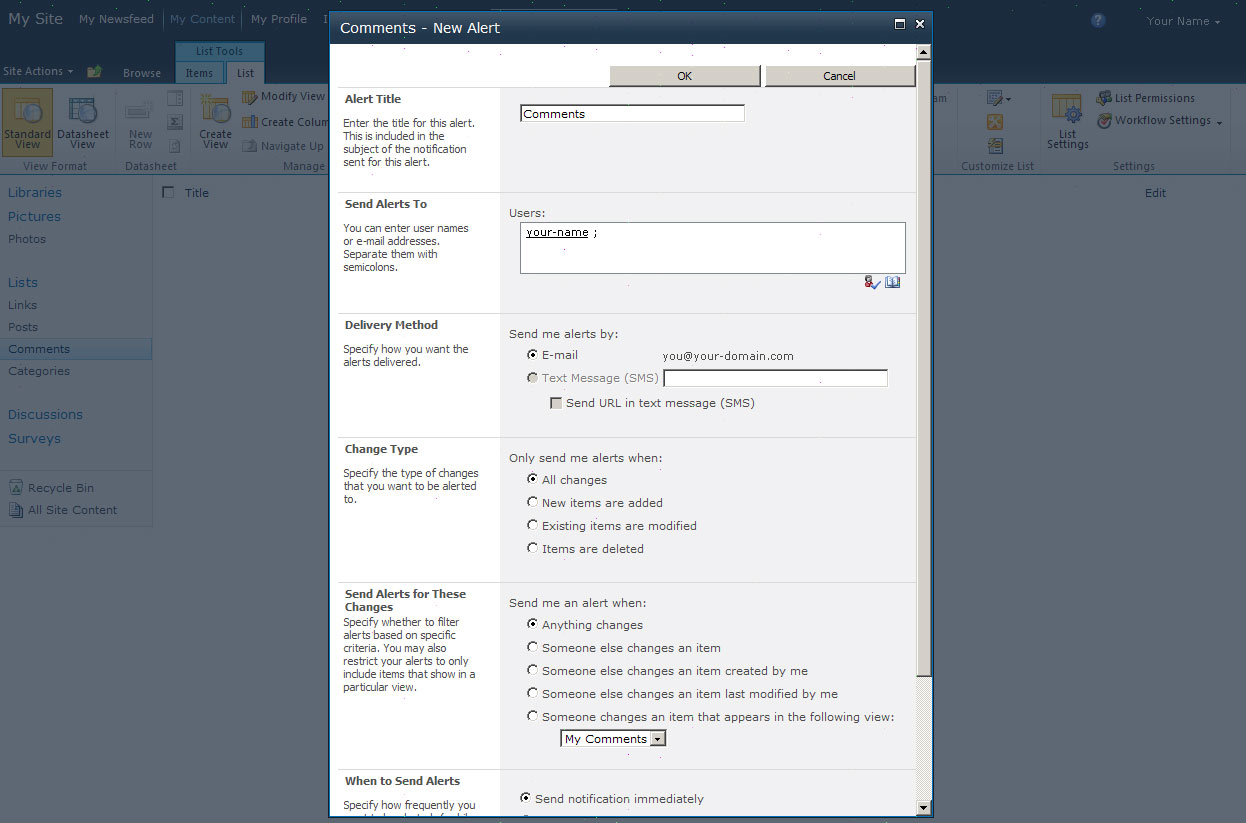
STEP 31
|
(Enlarge)
|
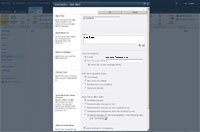
- Change the information as may be needed for a test and click the "OK" button. Go back to the blog, find a post and then leave a comment. Depending on the email alert timer job (set to 5 minutes by default when Sharepoint 2010 was installed), you should get an email alert indicating someone left a comment for the post under the blog.
|