(Enlarge)
|
- There are a few different ways that you may install Zend Server on CentOS (in our tutorial, into a virtualized LAMP server running in VMWare Workstation).
- The easiest method is by installing it via yum. The next easiest is by using the repository tar file that you get by downloading from the Zend website.
- What's the difference? While the yum method is extremely convenient, you risk downloading Zend Server 5.6 instead of whatever the latest version may be (in our case, 6x). That means, once it is installed, you may have to turn around and perform an upgrade with the repository file.
- With the repository method, it is more hands-on.
- I'd opt for the repository method, but this tutorial will cover both.
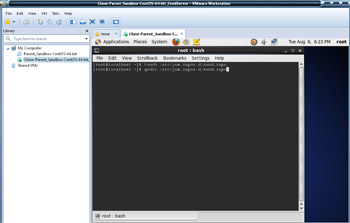
- YUM METHOD OF INSTALLATION:
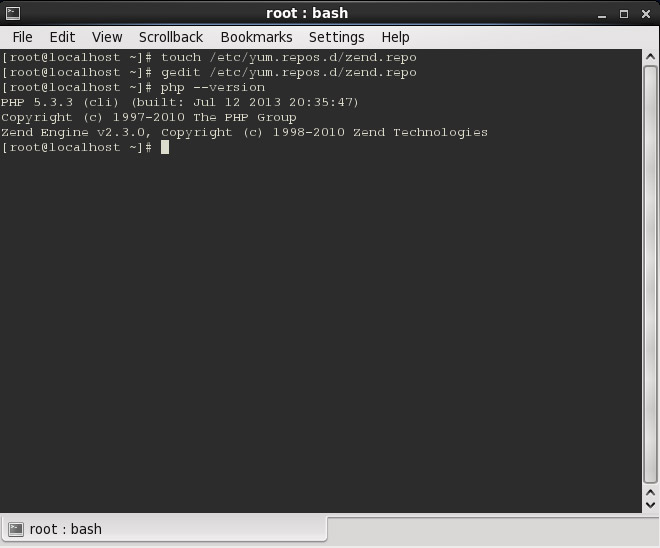
- To begin, go to the prompt and enter "touch /etc/yum.repos.d/zend.repo". Once the file is created edit the file via "gedit /etc/yum.repos.d/zend.repo".
|
(Enlarge)
|
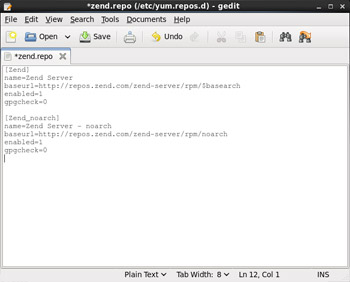
- YUM METHOD OF INSTALLATION:
- Enter the text as indicated and save the file.
|
(Enlarge)
|
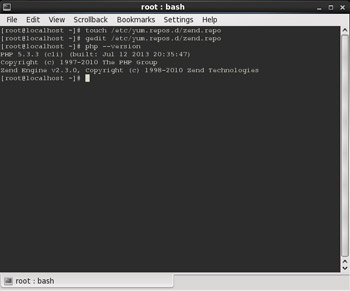
- YUM METHOD OF INSTALLATION:
- Find the version of PHP that is installed via "php --version". You'll need this so you can specify which PHP Zend Server will get installed.
|
(Enlarge)
|
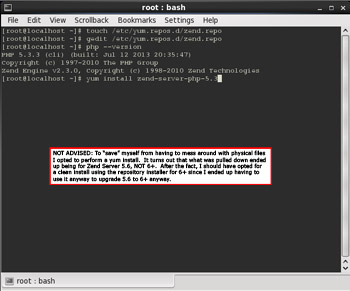
- YUM METHOD OF INSTALLATION:
- To install Zend Server that is compatible with the installed version of PHP enter "yum install zend-server-php-5.3".
|
(Enlarge)
|
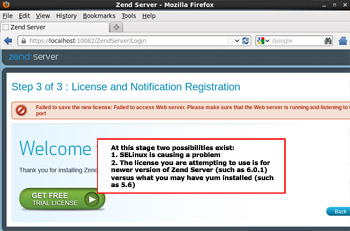
- YUM METHOD OF INSTALLATION:
- After installation, open Firefox and go to "https://localhost:10082". After going through some webpages to accept license terms, enter administrative credentials and the license, if you see this screen you have two possible problems:
- If you are running SELinux, you need to make appropriate changes to allow Zend Server to run (more on that in a moment).
- If you've made appropriate changes to SELinux (or don't have it), and you know your Zend Server license is valid, most likely the yum install got an earlier version of Zend Server that your license was not issued for.
|
(Enlarge)
|
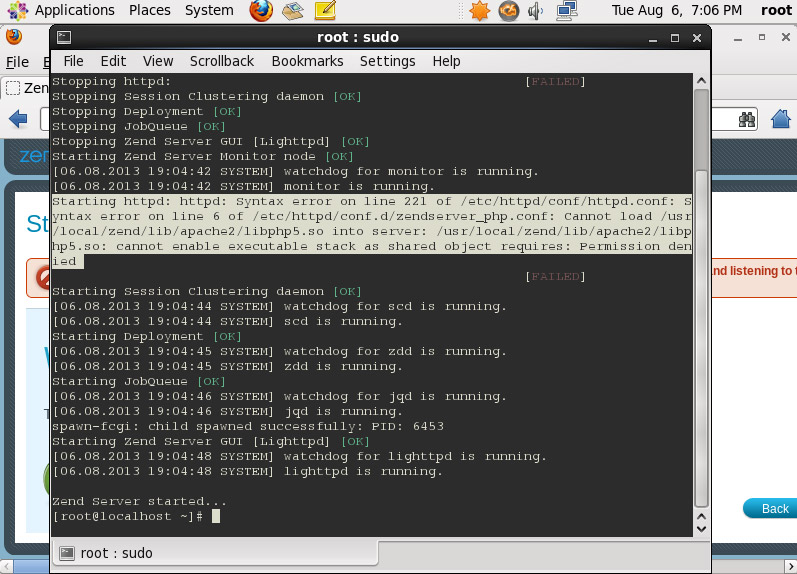
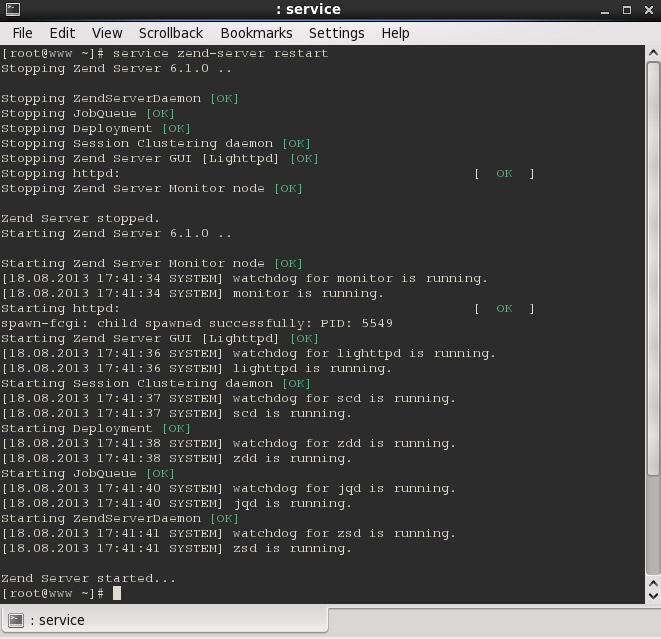
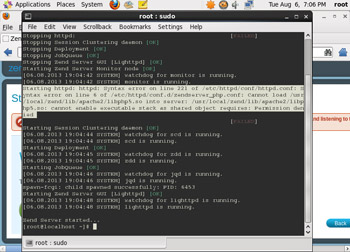
- AFTER ZEND SERVER INSTALLATION - SELinux:
- One thing that you can do to determine if SELinux is a problem is to enter "service zend-server restart".
- If you see a permissions issue centered around httpd, you've got a problem.
|
(Enlarge)
|
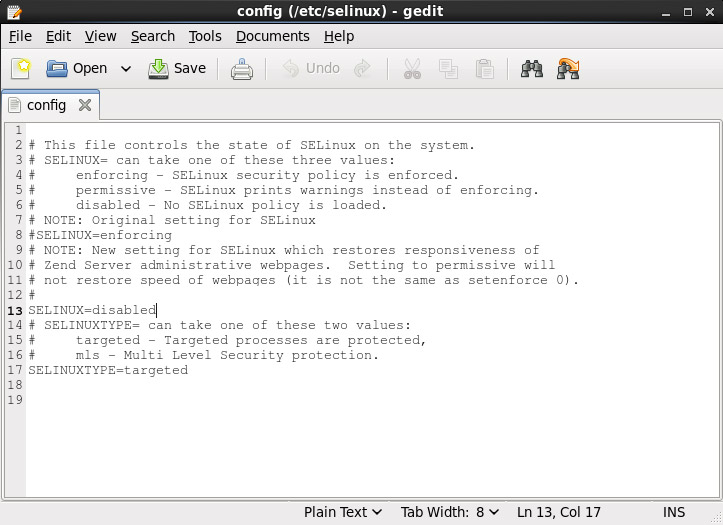
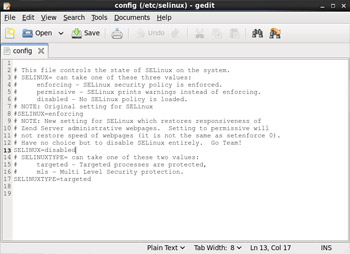
- AFTER ZEND SERVER INSTALLATION - SELinux:
- In order to determine if SELinux is, indeed, causing an issue you can temporarily disable it by editing "/etc/selinux/config" and setting "SELINUX=disabled".
|
(Enlarge)
|
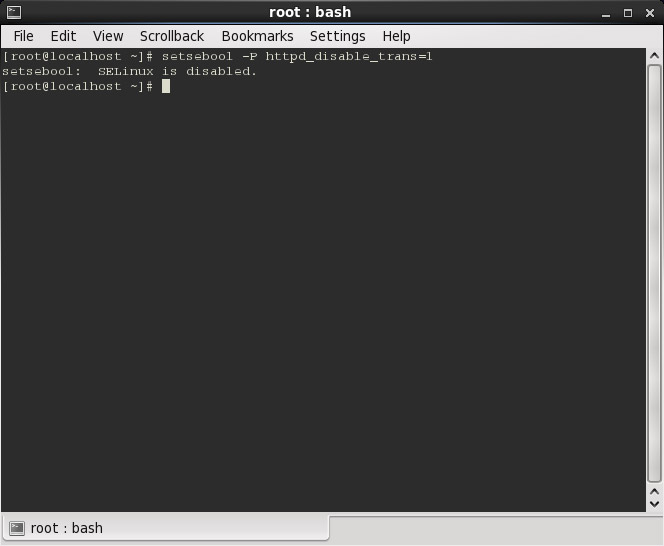
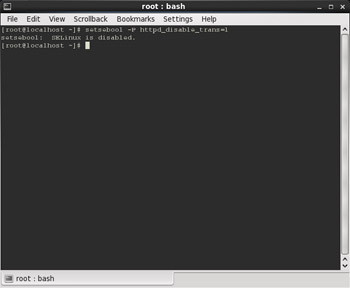
- AFTER ZEND SERVER INSTALLATION - SELinux:
- After a reboot you should be able to enter "setsebool -P httpd_disable_trans=1" to verify that SELinux is disabled.
|

(Enlarge)
|
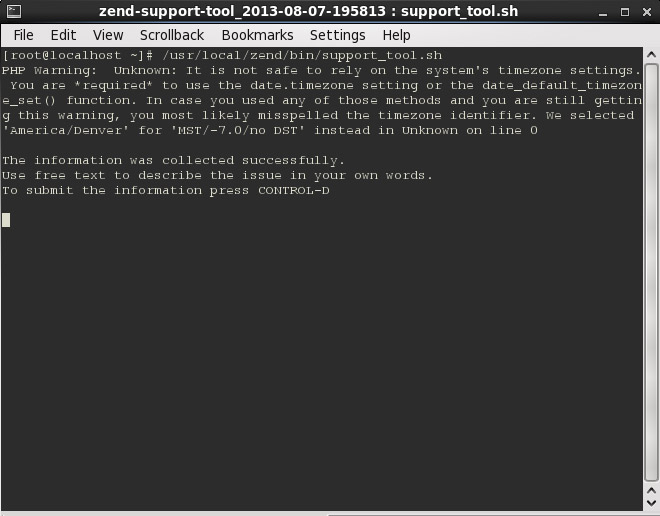
- AFTER ZEND SERVER INSTALLATION - Zend Support Tool:
- On a side note, once you've installed the Zend support tool "support_tool.sh", you can compile information they need to assist with troubleshooting via entering "/usr/local/zend/bin/support_tool.sh" at the prompt.
|

(Enlarge)
|
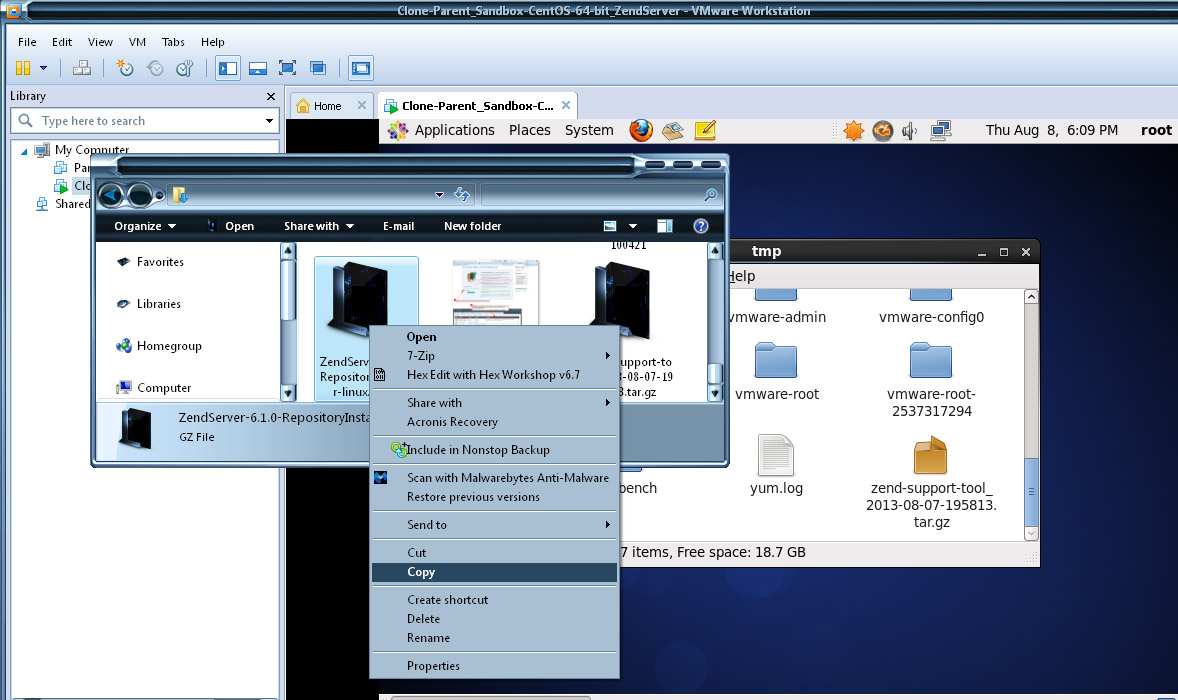
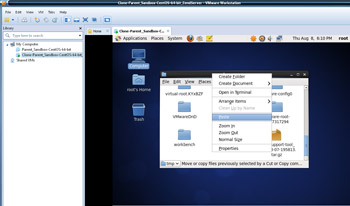
- REPOSITORY METHOD OF INSTALLATION:
- Luckily, since VMWare tools is installed on the LAMP server (see earlier tutorial), we can easily copy the Zend Server Repository file from the local hard drive by selecting the file and then Copy.
|
(Enlarge)
|
- REPOSITORY METHOD OF INSTALLATION:
- Then, inside of the VM (in this example the folder /tmp), right-click and select "Paste".
|
(Enlarge)
|
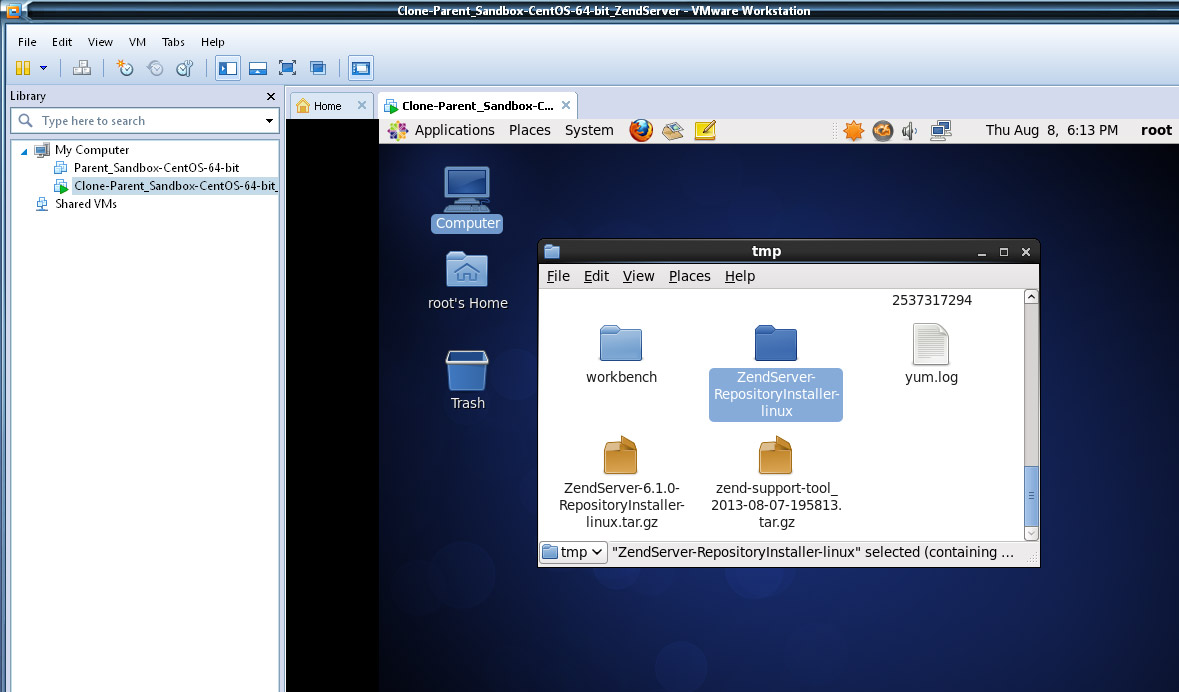
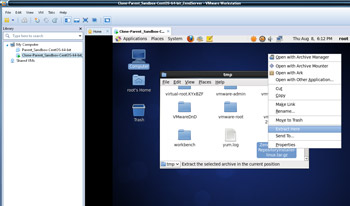
- REPOSITORY METHOD OF INSTALLATION:
- After the file finishes copying, right-click on it and select "Extract Here".
|

(Enlarge)
|
- REPOSITORY METHOD OF INSTALLATION:
- The extraction will create a new folder for the Zend Server installation data.
|
(Enlarge)
|
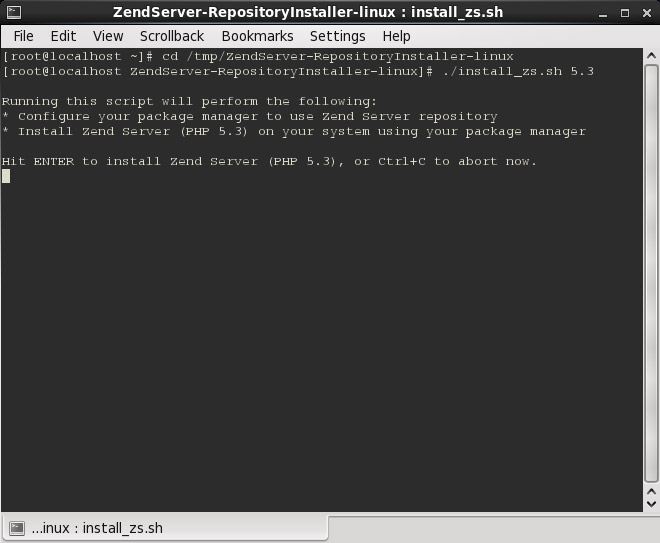
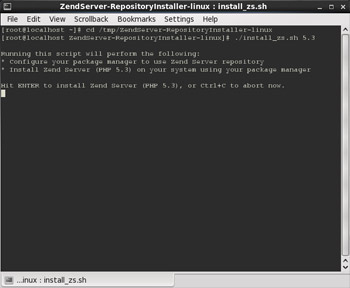
- REPOSITORY METHOD OF INSTALLATION:
- From the prompt navigate to where the Zend Server installation folder was created, in this case "cd /tmp/ZendServer-RepositoryInstaller-linux". Then enter "./install_zs.sh 5.3" where 5.3 is the version of PHP that is already installed.
|
(Enlarge)
|
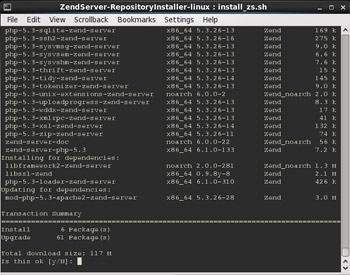
- REPOSITORY METHOD OF INSTALLATION:
- The installation process will begin and you will be asked if downloading is okay.
|
(Enlarge)
|
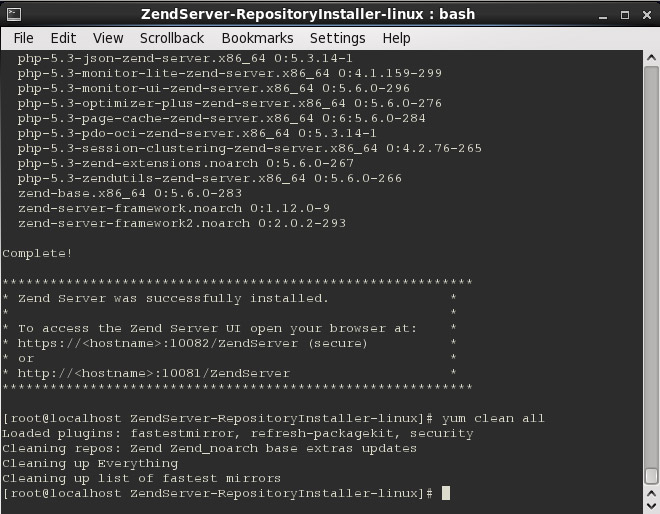
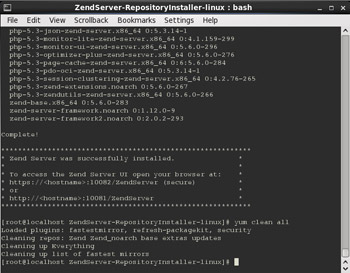
- REPOSITORY METHOD OF INSTALLATION:
- After installation completes might as well perform a "yum clean all".
|
(Enlarge)
|
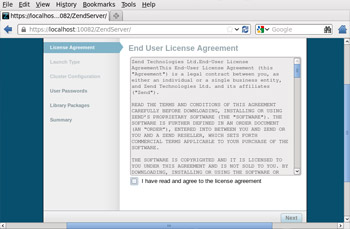
- REPOSITORY METHOD OF INSTALLATION:
- Open Firefox and enter "https://localhost:10082". You'll have to complete some one-time steps before you can actually start using Zend Server.
|
(Enlarge)
|
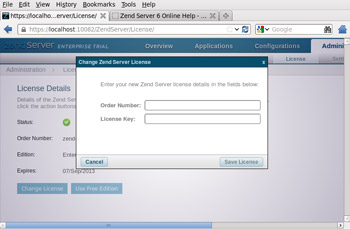
- AFTER INSTALLATION:
- Have your order and registration number handy as you'll need it here.
|
(Enlarge)
|
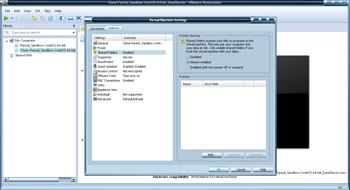
- AFTER INSTALLATION:
- Power off the VM. You may want to check to see if folder sharing is enabled for the VM and select "Enabled until next power off or suspent" or "Always enabled" if needed.
|
(Enlarge)
|
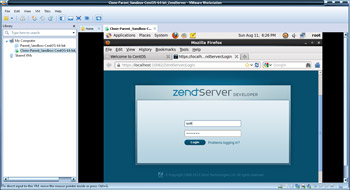
- AFTER INSTALLATION:
- Then power on the VM, login, open "https://localhost:10082" and login to Zend Server.
- At this point your LAMP server should be up and running with Zend Server!
|
(Enlarge)
|
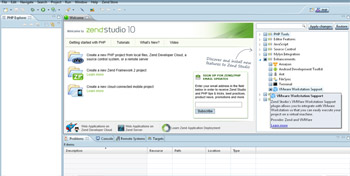
- GETTING ZEND STUDIO AND ZEND SERVER TO COMMUNICATE:
- In the developer enviornment, you most likely have Zend Studio installed on your OS and not inside of the LAMP Server VM. There are a few things that you need to do in order to sync-up Zend Studio with Zend Server in the VM.
- First ensure that the VM is running (and you are OPTIONALLY logged into Zend Server).
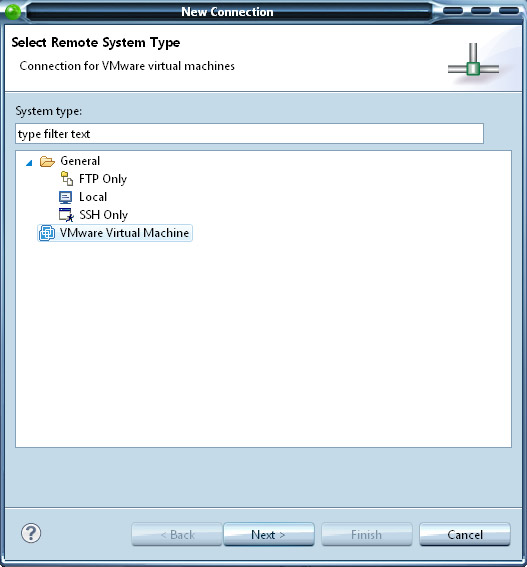
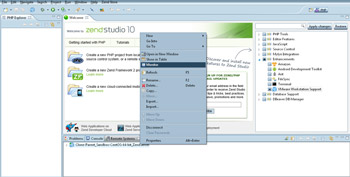
- Next, open Zend Studio 10. Select "VMWare Workstation Support" under "Enhancements".
|
(Enlarge)
|
- GETTING ZEND STUDIO AND ZEND SERVER TO COMMUNICATE:
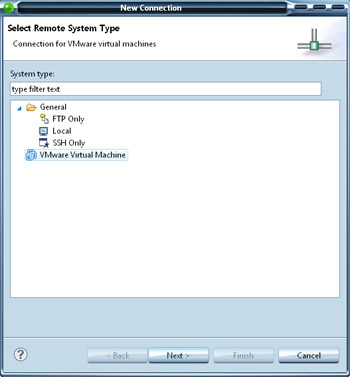
- From the pane that will appear, select "VMware Virtual Machine".
|
(Enlarge)
|
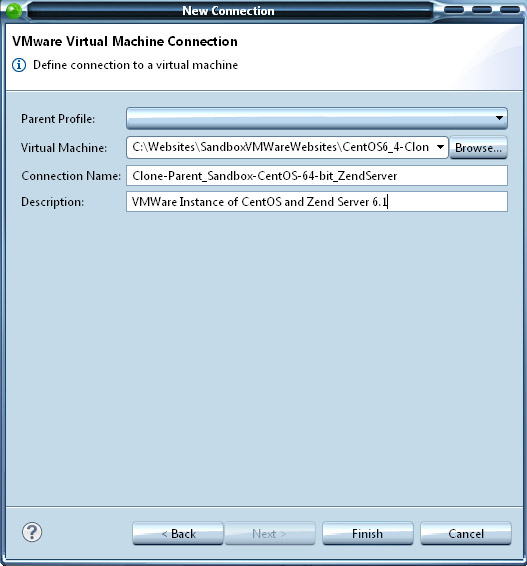
- GETTING ZEND STUDIO AND ZEND SERVER TO COMMUNICATE:
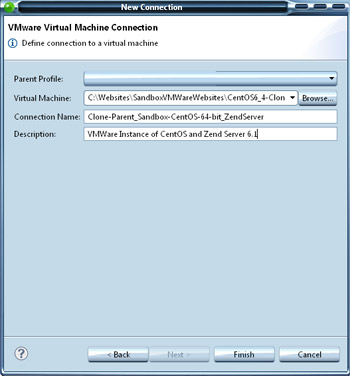
- On the next pane, browse to the VM, specify a connection name (should be unique enough you can easily tell it apart from other connections) and a description.
|

(Enlarge)
|
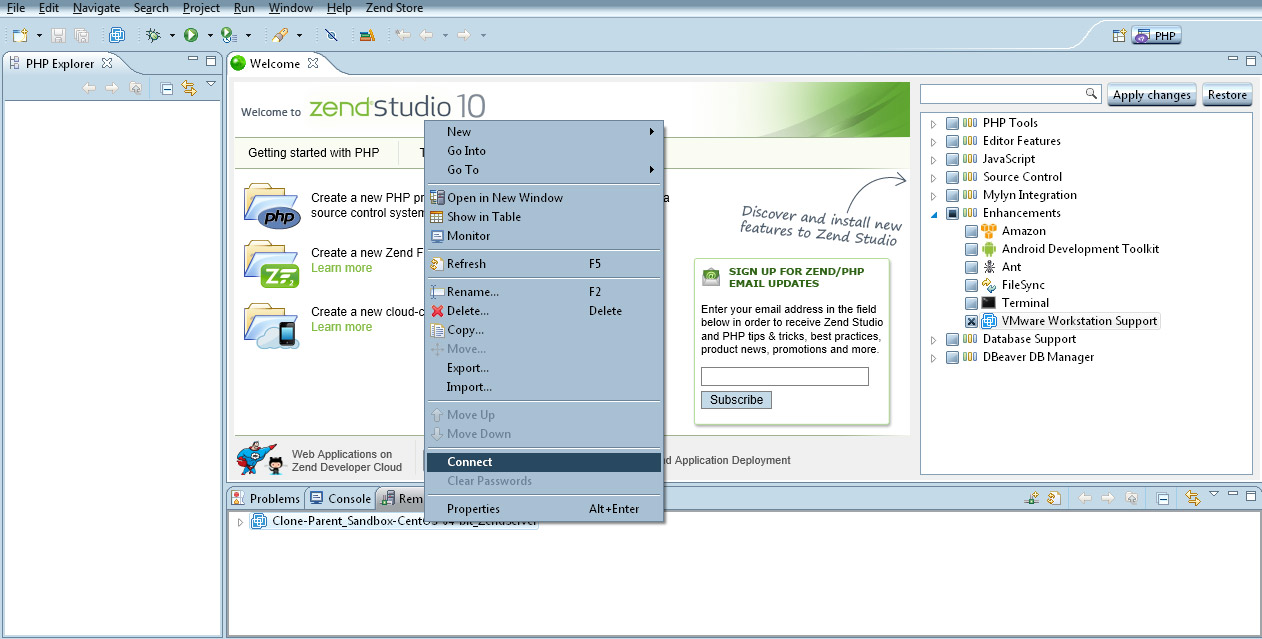
- GETTING ZEND STUDIO AND ZEND SERVER TO COMMUNICATE:
- Now that the connection has been created, you should be able to right-click on the connection and select "Connect".
|
(Enlarge)
|
- GETTING ZEND STUDIO AND ZEND SERVER TO COMMUNICATE:
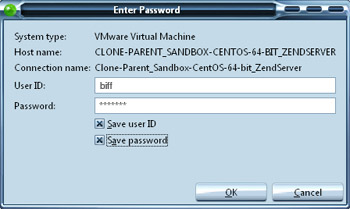
- Next, you will need to enter the administrative credentials for Zend Server.
|

(Enlarge)
|
- GETTING ZEND STUDIO AND ZEND SERVER TO COMMUNICATE:
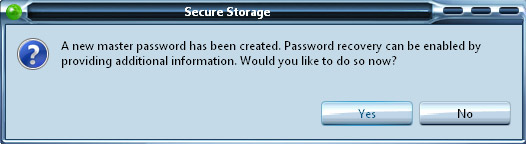
- You'll be prompted to setup password recovery (continue if you want).
|
(Enlarge)
|
- GETTING ZEND STUDIO AND ZEND SERVER TO COMMUNICATE:
- At anytime you can also right-click on the connection and select "Monitor" which provides additional connection information.
|

(Enlarge)
|
- GETTING ZEND STUDIO AND ZEND SERVER TO COMMUNICATE:
- In this case, it is showing we are 100% connected.
- At this point you should now be (1) up and running with Zend Server, and, (2) have Zend Studio 10 sync'ed up to Zend Server!
|