(Enlarge)
|
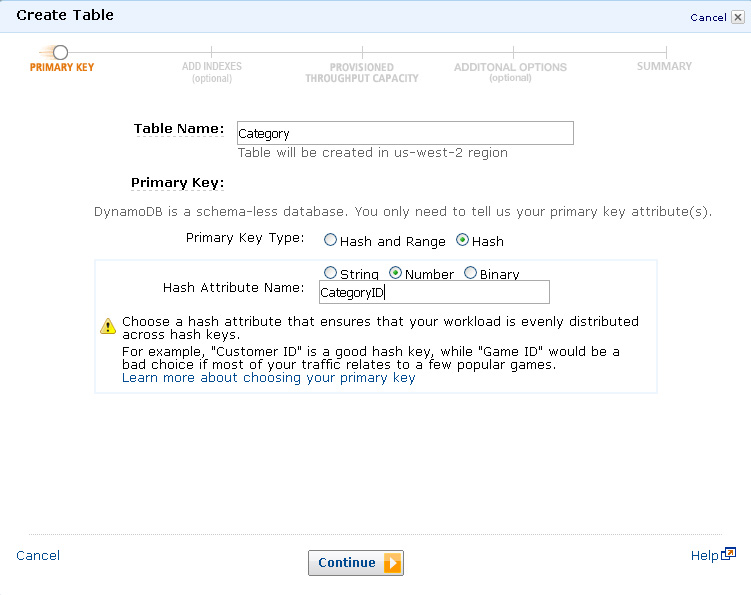
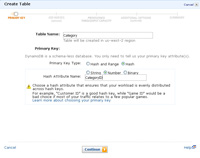
- The first thing that needs to be done is to create a table in DynamoDB that the CSV table data (exported from RDS to S3) will go into. At this stage you only need to specify the name of the DynamoDB table along with a key of some sort (unlike mySQL you do not have to define every column in a table). To keep it simple, a standard primary key will be used (known as a hash key in DynamoDB).
|
(Enlarge)
|
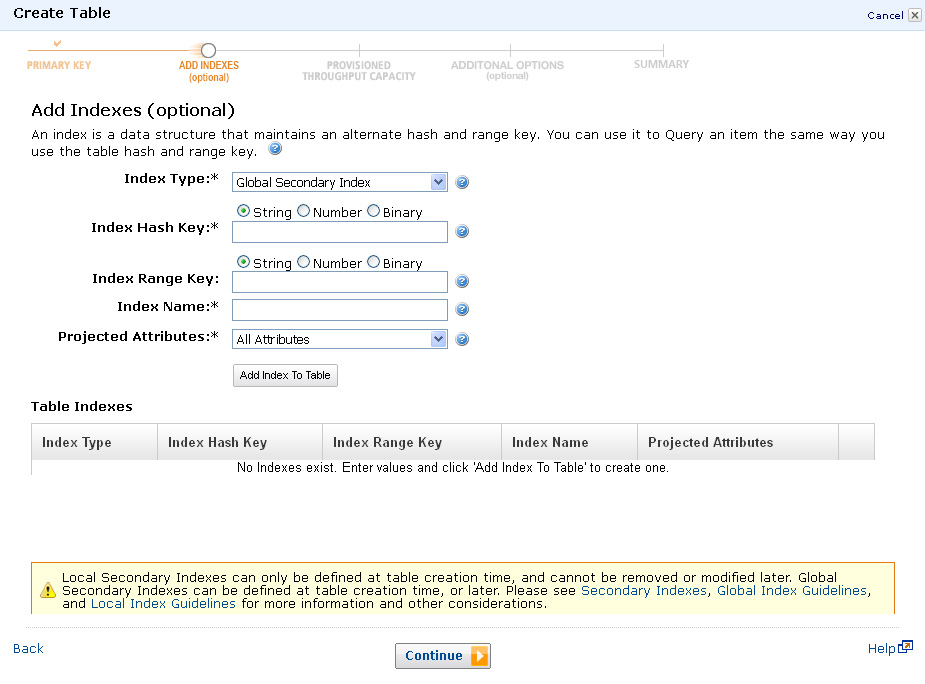
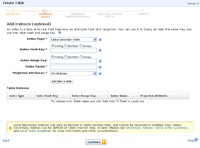
- You can also define a secondary index (an alternate way to link data together for, say, a different method of searching).
|
(Enlarge)
|
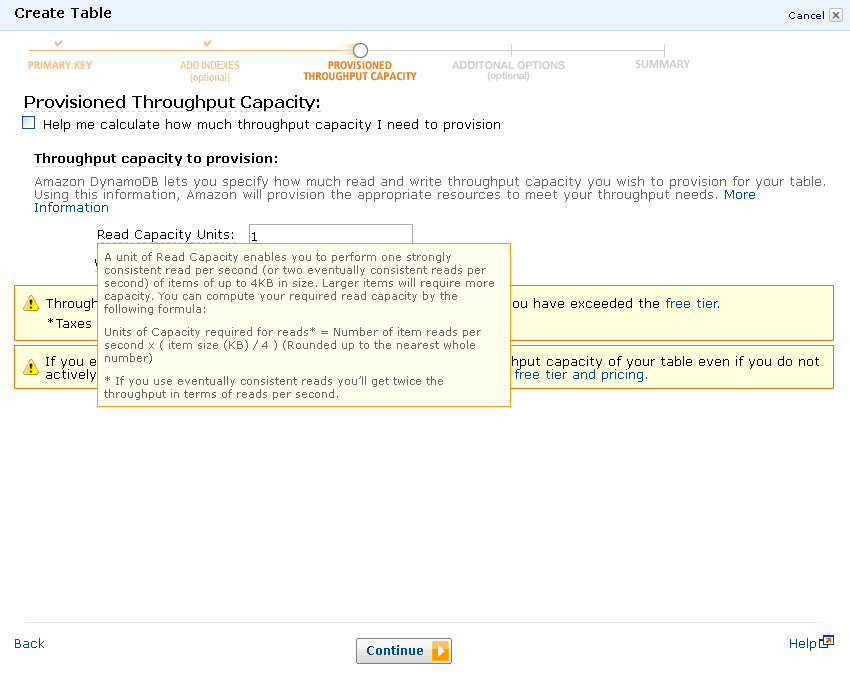
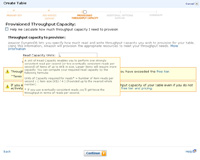
- You will be required to specify the desired responsiveness of your DynamoDB table via reads and writes. This image shows the actual formula that you will need to use in order to make that determination.
|
(Enlarge)
|
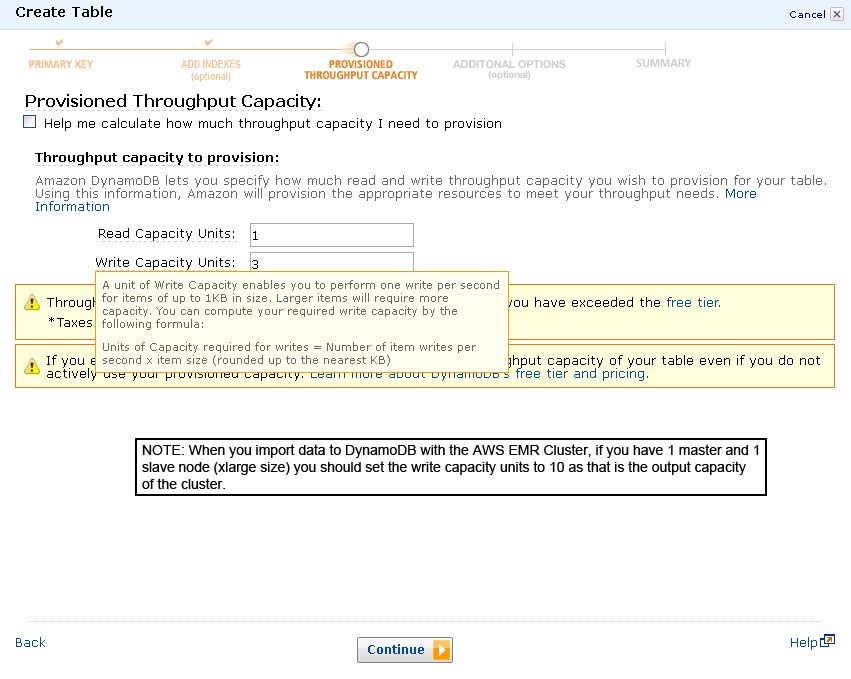
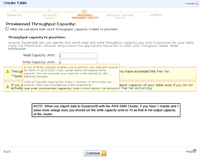
- Like the previous step, this image shows the actual formula that you will need to use for determining writes.
- It is important to remember that for each xlarge node in the EMR cluster approximately 10 write capacity units are available. This means that if you have a cluster with a master and one slave node, it will have 10 write capacity units so your DynamoDB table (at least for the data import process) should be set likewise for the write capacity units.
|
(Enlarge)
|
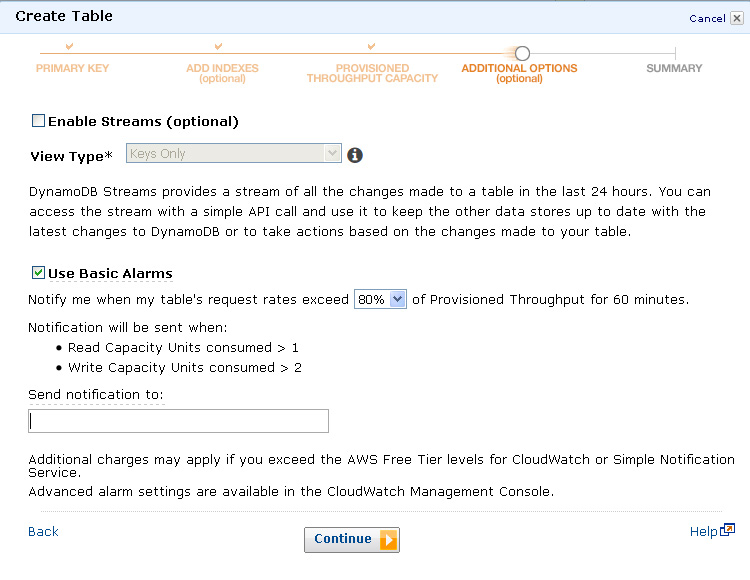
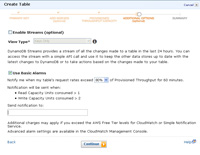
- At this step you can specify whether streams (aka logging) should be used along with where to send notifications when read or write capacity is exceeded.
|
(Enlarge)
|
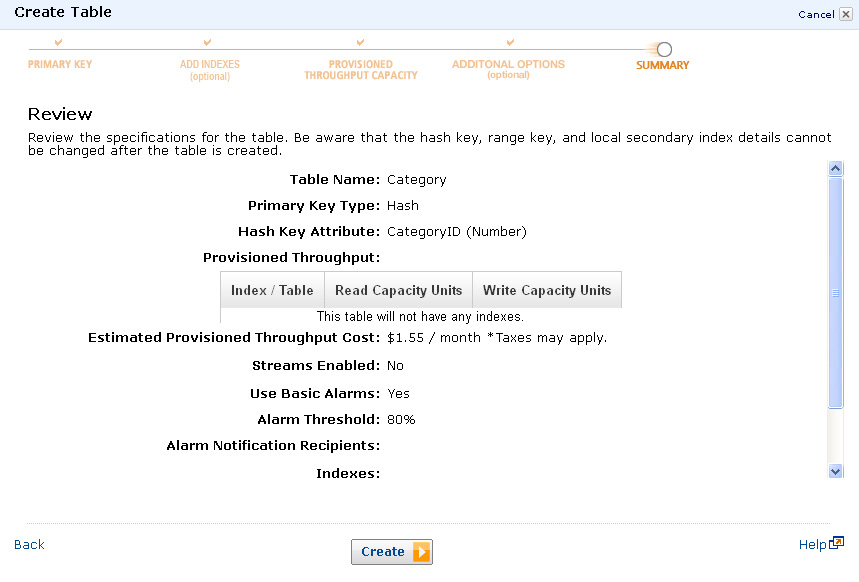
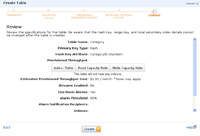
- At this step you can review what you have specified and proceed to create the DynamoDB table.
|
(Enlarge)
|
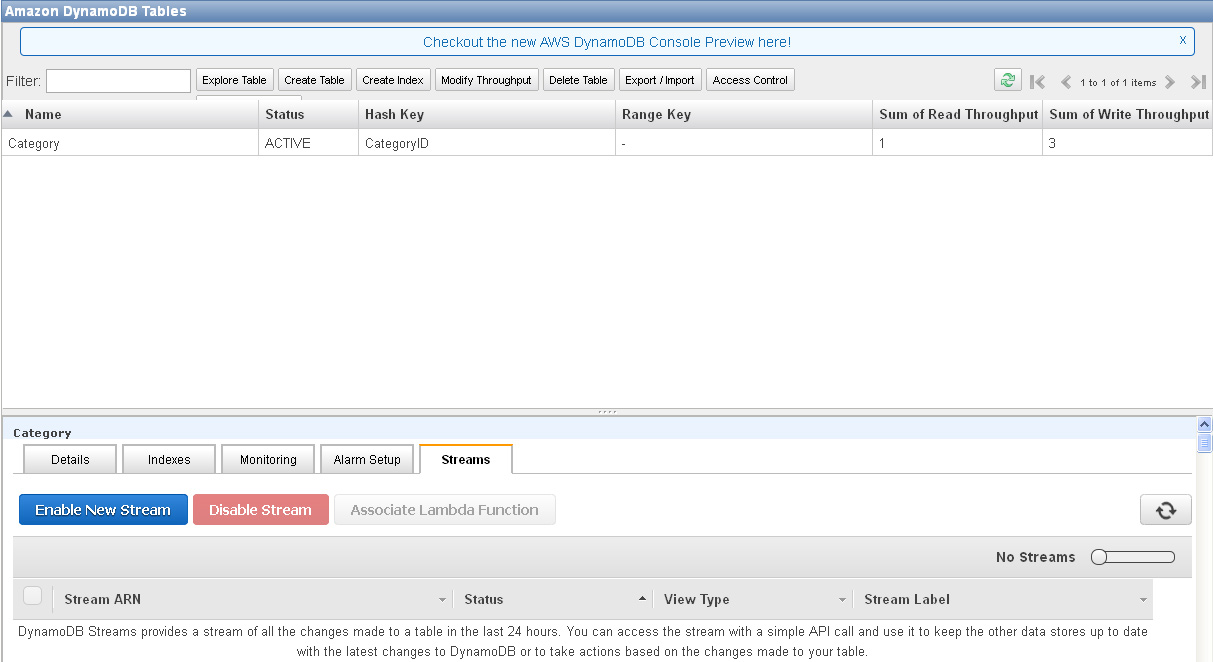
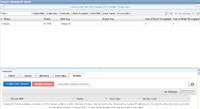
- After a few minutes you should be able to see the new DynamoDB table in the AWS console as shown here.
|
(Enlarge)
|
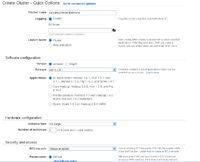
- Now it is time to go to AWS EMR (under Analytics) and create a small EMR cluster so that we can take the content of the CSV on S3 and put that into the DynamoDB table we created earlier.
- As you can see here, the settings are straight-forward.
- It is important to remember that for each xlarge node in the EMR cluster approximately 10 write capacity units are available. This means that if you have a cluster with a master and one slave node, it will have 10 write capacity units so your DynamoDB table (at least for the data import process) should be set likewise at least for those write capacity units.
|

(Enlarge)
|
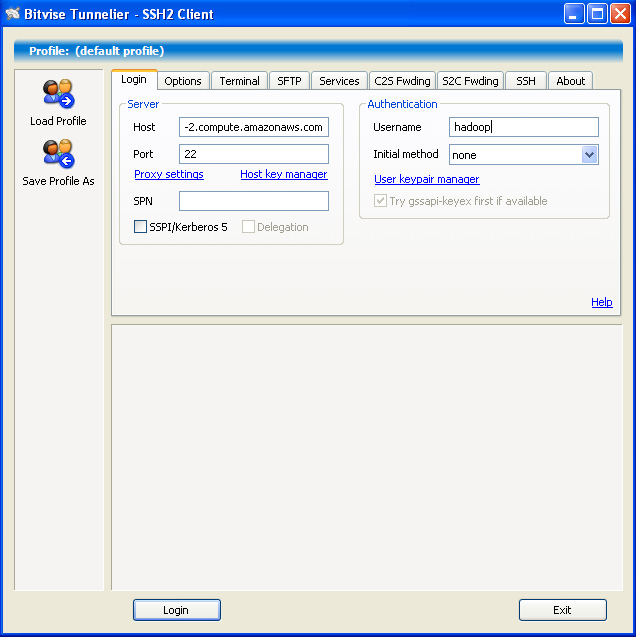
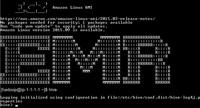
- After the EMR cluster has been created (may take a few minutes) you will be provided a DNS address (or endpoint as other parts of AWS refer to it as). Since we are using HIVE in the EMR cluster, take the endpoint (ensure you're IP is added to the security group and you have the key-pair) and use a login of hadoop in an SSH client.
|
(Enlarge)
|
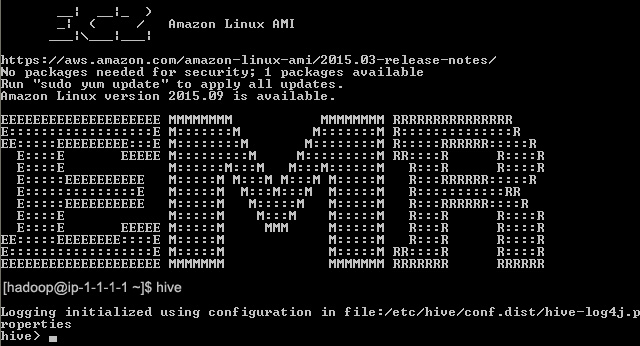
- When you SSH into the cluster you should see the welcome message as shown here. In order to get to HIVE, simply type in hive and press enter.
|
(Enlarge)
|
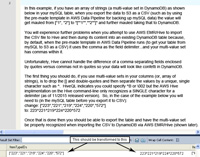
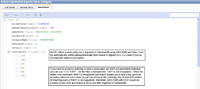
- Before continuing, there are some catches you should be aware of as it pertains to how the Data Pipeline exports a mySQL table out of RDS and onto S3.
- If your mySQL table contained an array of values in the form of ["1", "2"] as the column value, when that data is exported into a CSV and on to S3, it will be transformed to "[\"1\", \"2\"]". At this point your data is useless from this point forward. By the time that makes it into DynamoDB via HIVE it will be further mangled to something like \"[\\"1\\". Everything after that first comma in your array will be lost as well.
- To get around this mangling issue with the CSV export from RDS (using data pipeline and the export to S3 template) and how HIVE interprets the CSV, you should remove the use of all double-quotes in the column and change the comma to a different character such as ^.
|

(Enlarge)
|
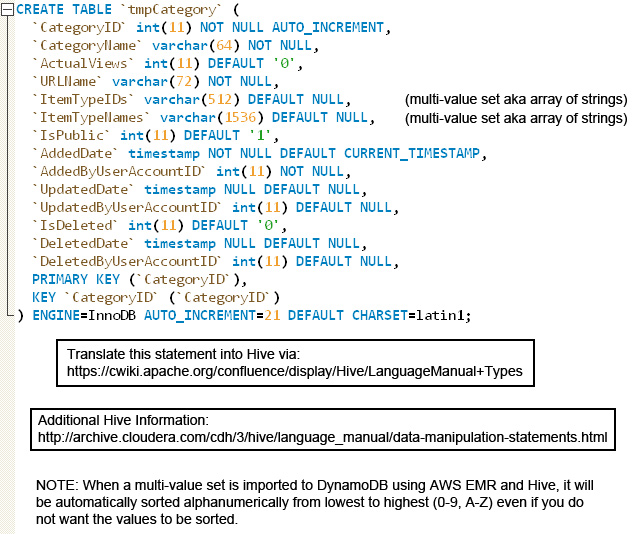
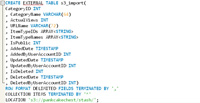
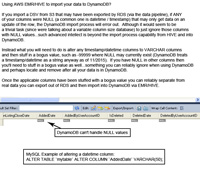
- With HIVE you will need to define all the columns from the table you exported to a CSV as shown here. Here, the original mySQL table structure is shown.
- For HIVE syntax, see this webpage.
- Also see this webpage.
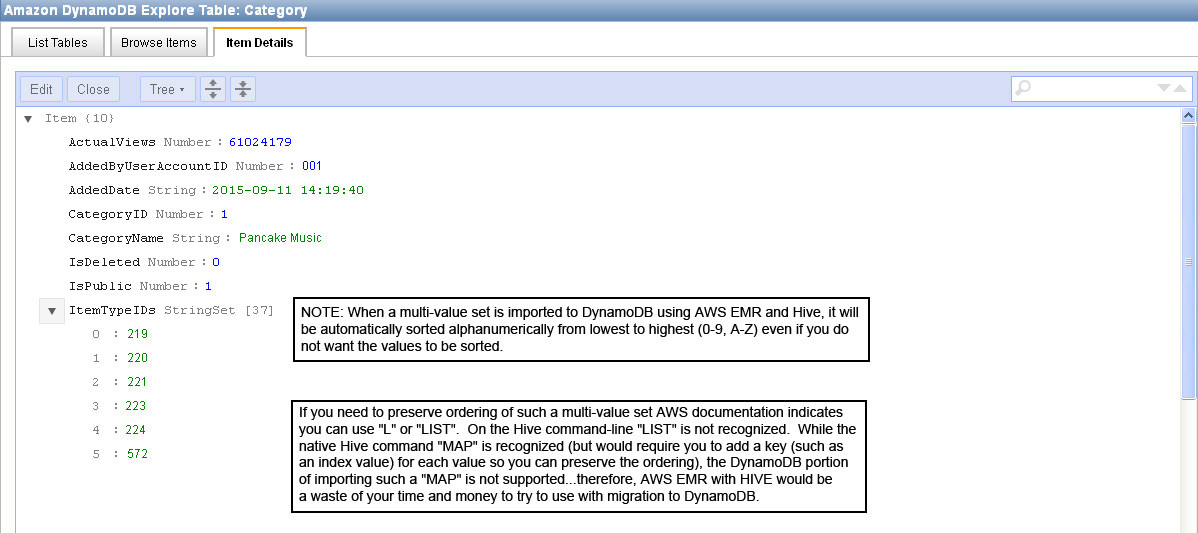
- IMPORTANT NOTE #1: If you have an array of values you are storing in a column, when it is imported into DynamoDB it will be automatically re-ordered alphanumerically with NO option for you to override that behavior. For some this may not be a problem, but if your values need to be preserved in the order that they were originally in, you'll have to find a different way of getting your data into a DynamoDB table.
- IMPORTANT NOTE #2: If you have an array of values where ANY value is repeated (such as 1,2,1) DynamoDB will throw an error and stop importing data from HIVE. Every value in your array of values must be unique. This behavior may be related to the non-overridable behavior of the AWS EMR/HIVE import process to perform an alphanumeric sort on an array of values.
|
(Enlarge)
|
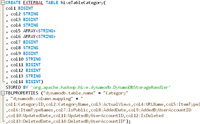
- This step shows an example HIVE syntax that your original mySQL table syntax will need to be transformed to, for this tutorial.
|

(Enlarge)
|
- The next thing that needs to be done is to take the transformed mySQL table syntax (which should be HIVE compatible) and put that in the HIVE command-line.
|
(Enlarge)
|
- At this step you create the syntax of the table structure that you will be moving your data into. Remember that DynamoDB contains few types. As well, the AWS implimentation of Hive in their EMR cluster, does not even support all the types that DynamoDB does have (as of 11/2015). For example, DynamoDB supports LISTS and MAPS (for example, to preserve array value ordering if needed) but the AWS implimentation of HIVE only recognizes MAP on the import side of your CSV data and, yet, does not support it on the export side to DynamoDB. So, keep it simple.
- Likewise, recent AWS DynamoDB documentation suggests support for decimal data types (announced around August 2015). However, that is NOT actually the case with AWS EMR/HIVE going to DynamoDB. That is, specifying a data type of NUMBER (unique to Dynamo), DECIMAL, DECIMAL (with parameters), FLOAT all fail...the ONLY data type to preserve a mySQL data type of DECIMAL is DOUBLE.
|

(Enlarge)
|
- At this step, enter the table structure for the data as it will appear in DynamoDB.
|

(Enlarge)
|
- Now with the mapping in place you can import the data from the CSV on S3 through the AWS EMR / Hive cluster and into DynamoDB by using the INSERT command as shown here.
|
(Enlarge)
|
- Since we have a small set of data for this tutorial, it only takes an average of 18 seconds for the migration to complete. Once complete you should be able to enter into the AWS DynamoDB console (just a webpage), to see the data that was migrated.
- If you have a larger table of approximately 2 million rows that has an equivalent of 2 writes per row then, with a 2 server cluster (1 master - 1 slave), it will take about a week to complete importing into DynamoDB.
|
(Enlarge)
|
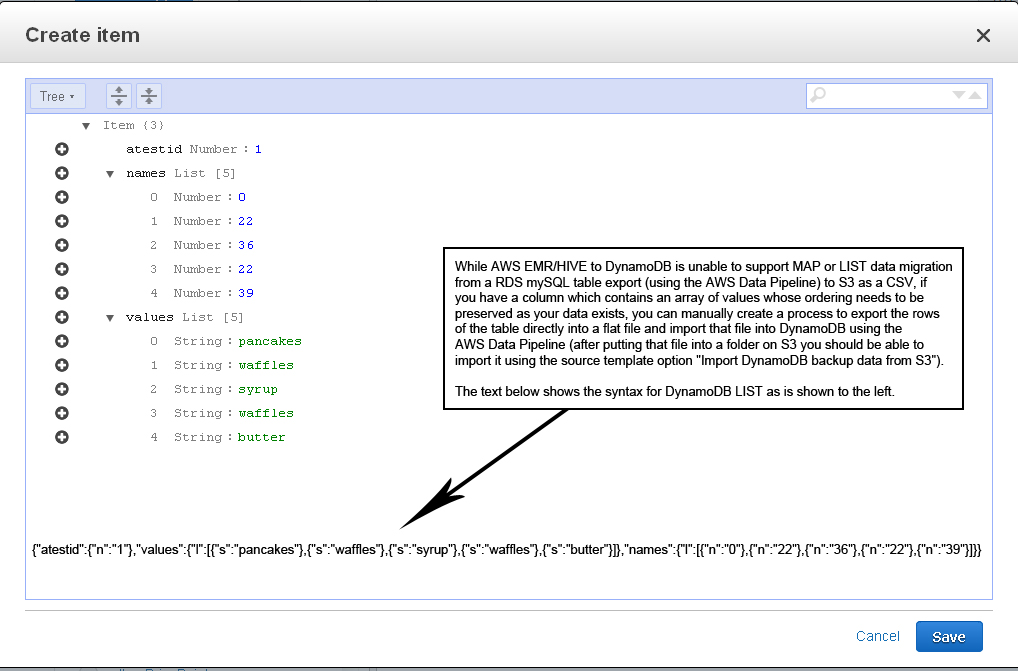
- Finally, one last thing to mention if you have exported a CSV from RDS using the data pipeline and the option to export an mySQL table to S3, and you plan on using AWS EMR/HIVE to import that data into DynamoDB...
- If you have a column that contains a NULL value, DynamoDB will throw an error so all your columns for all rows have to have a value present. You may think that in our modern technological age, and given that DynamoDB is a "schema-less" database (e.g., variable column length database) the importation process via AWS HIVE to DynamoDB would simply ignore a column of a row being imported that is NULL. Unfortunately, that is not the case as of 11/2015. Be sure to plan accordingly.
|